
|
PLEASE PATRONIZE OUR SPONSORS!


|
|||||||
 |
|
|
Thread Tools | Display Modes |
|
#322
 08-22-2011, 06:23 PM
|
||||
|
||||
|
Glad to hear all went really good. As for the ring compressor, it's actually pretty easy to get the rings in without one, I just use an extra small straight slot screwdriver to get each ring started into the bore and work my way around. It goes pretty quick. The compressor works even better
 . .
__________________
DWayne 1973: 128, ag tires, 3pt. lift, spring assist, lights, 42" Deck 10" moldboard plow 2016 XT1 42" deck 18HP 
|
|
#324
08-22-2011, 11:55 PM
|
||||
|
||||
|
Dave,
Recovery is EVERYTHING! Nice job on the details and you will sleep much better! Regards, Chris
__________________
Casbohm Maple and Honey www.mapleandhoney.com Cubs: 147R and the "train", 127 elec lift, 127, 125, 106, 102, 100, 86, 73, Brinly plow, Snow thrower, 2 Rototillers, several mower decks and several snow plows, #1 cart, Grandkids barrel cart.
|
|
#325
08-23-2011, 01:23 AM
|
||||
|
||||
|
Matt, to catch up on your earlier query:
Quote:
The machinist checked the valves in the guides with me watching, and they were solid. In fact, when I first picked up the block I had the valves in hand and he wound up reaming out the exhaust valve guide a little. If you recall, the engine had a stuck exhaust valve when I got it. Everything looks pretty good here, and I did actually get a pretty good feeling about this guy this time around. He knows his stuff. The company he works for is a big regional tractor service shop, so he's working on big tractor engines as well as garden tractor engines every day.
|
|
#326
08-23-2011, 01:54 AM
|
||||
|
||||
|
Time to start putting the K341 back together.
I'm going to do this in detailed fashion, as much as I can document, for two reasons: 1) So you guys that know what you're doing can catch any mistakes I might make (so watch closely and let me know!,) provide better ideas, and... 2) To show things in much greater detail than the service manual, so guys like myself who haven't done this before can feel more confident about doing the job, and can reference this build-up when they do it themselves. I'll use the Kohler Service Manual's numbered order of reassembly steps: 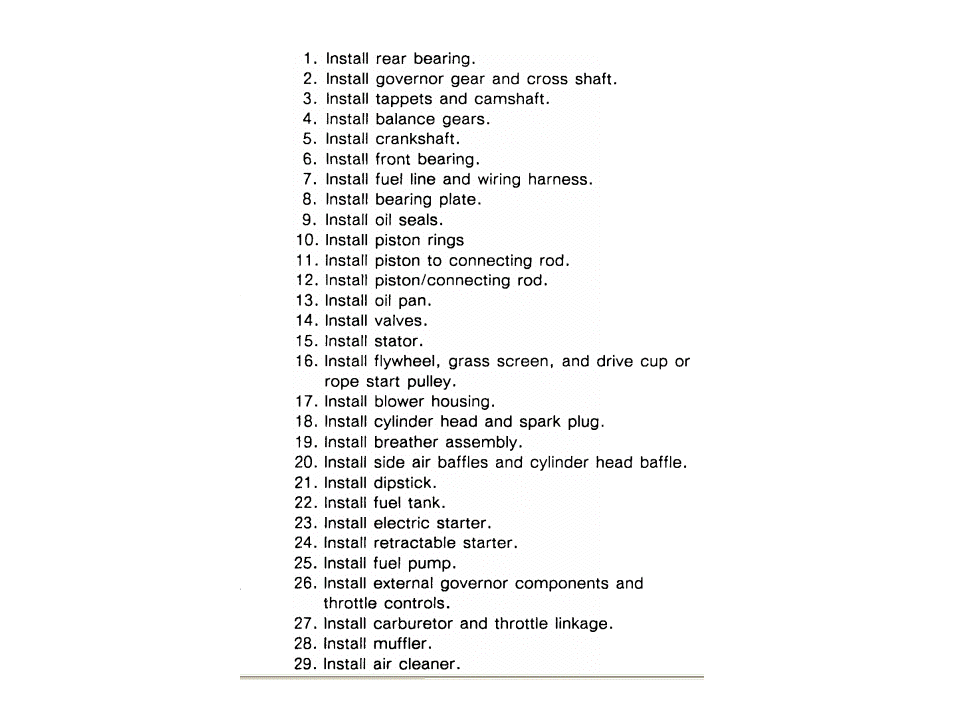
|
|
#327
08-23-2011, 02:20 AM
|
||||
|
||||
|
After sitting disassembled for a while, there was some mild surface rust present on the bearing assembly and the seat it goes in, so I gave them a quick hit with steel wool (until I started thinking about fragments hanging out) and then a 1200 grit paper. I then blew them out with compressed air to get any dust or steel wool out.
Here's the seat for the bearing: . 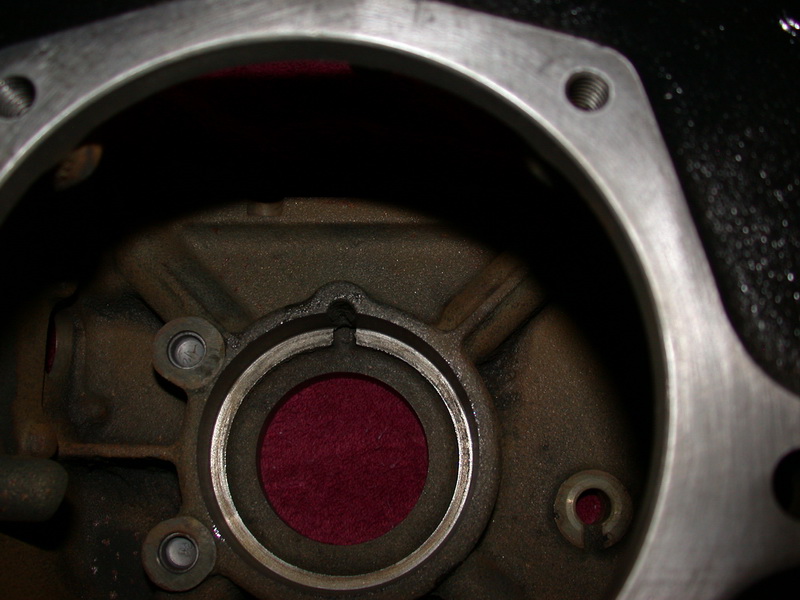 . I gave the surfaces a light coating of engine oil to help it go in a little easier. Here's the bearing sitting in place ready to drive it in. Mine is a shielded type bearing, so the shielding goes on the inside: . 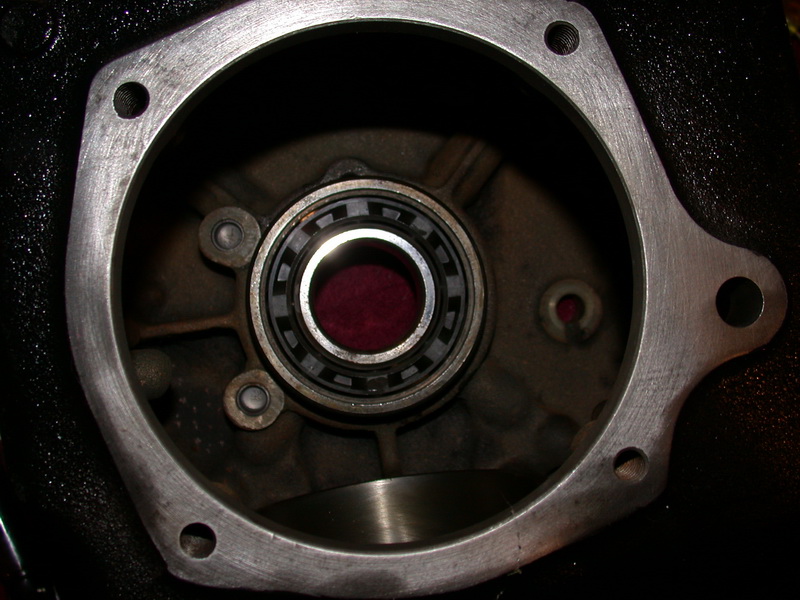 . I then laid it flat on the bench, and (lacking a #4747 handle and appropriate bearing installer) used a piece of 2x4 to drive it into place: .  . And here it is, seated (a bit blurry, but you get the point) . 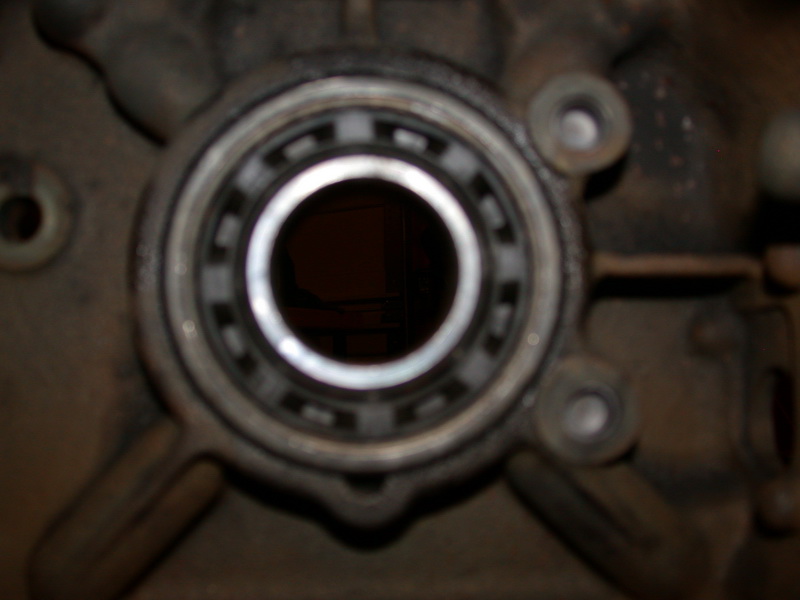 . Some concern about dust, dirt, and wood particles on this procedure, but I blew it all out again with compressed air. I can't do this in a medical clean room after all, and I'll change out that first oil early.
|
|
#328
08-23-2011, 02:55 AM
|
||||
|
||||
|
I purchased a new governor gear, cross shaft, and bushing (the brass nut/bushing that screws in from outside) at a cost of around $65. This is recommended by most of the guys on OCC.
The shaft goes in first: . 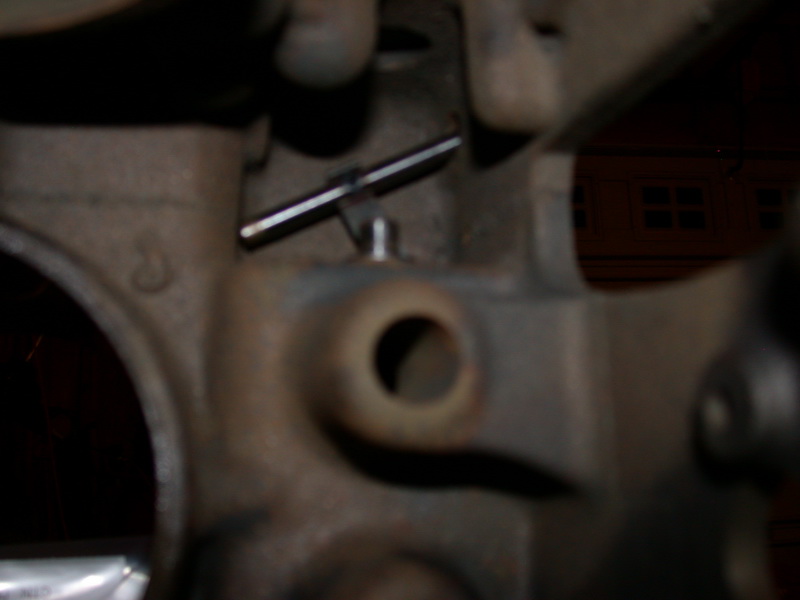 . 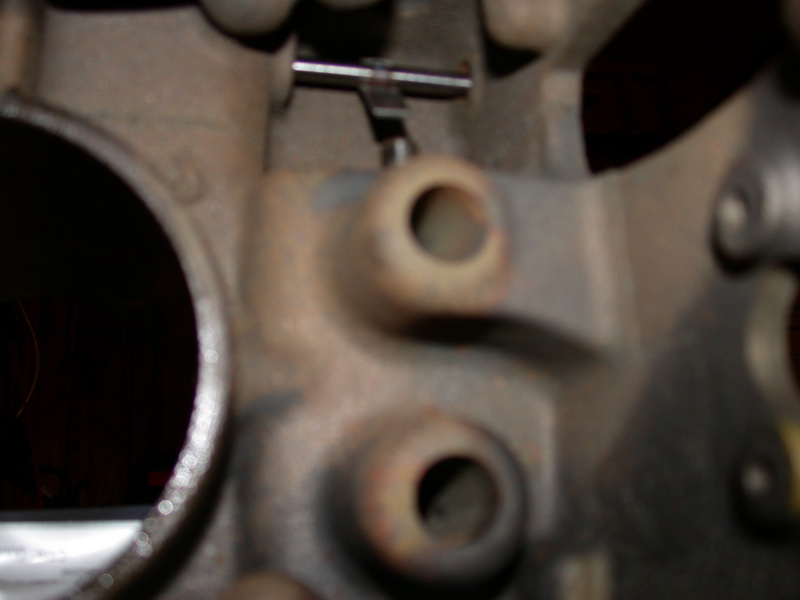 . Here is your governor gear. You'll note that the pin sticks up when centrifugal force expands the weights: . 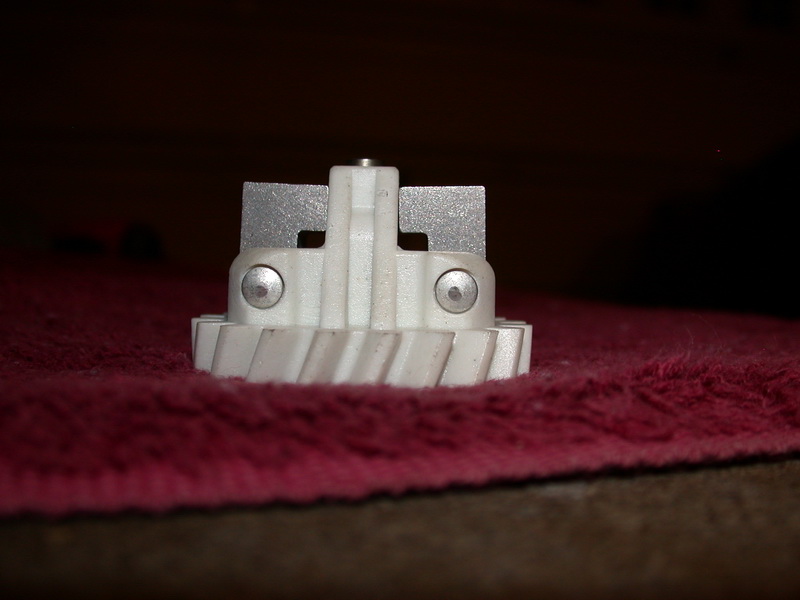 . 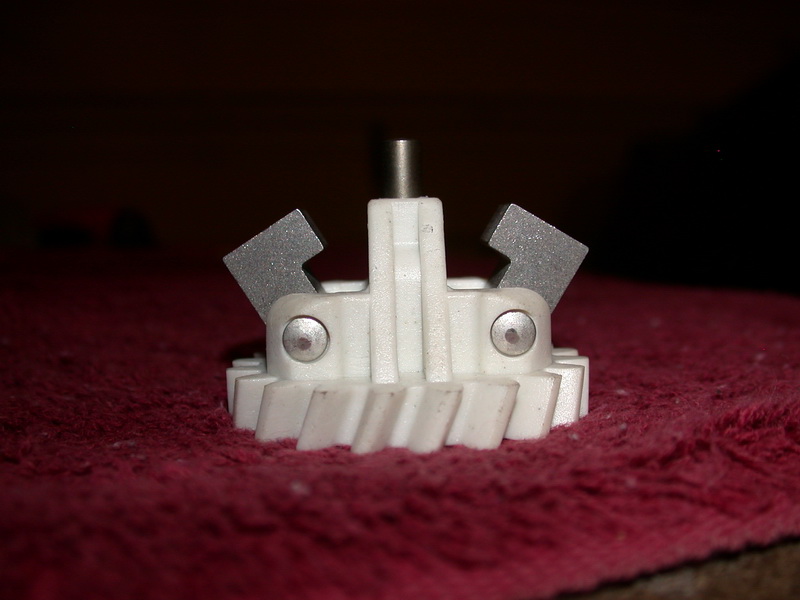 . That pin will push up on the lever that is welded to the shaft. . This thin washer came with the new governor gear. I don't have any record of this washer on disassembly (and I haven't looked through my old parts yet) but I figure it has to go on the pin the governor gear sits on, before the governor gear. It lays flat and hides up there, so it's possible I never noticed it on disassembly. . 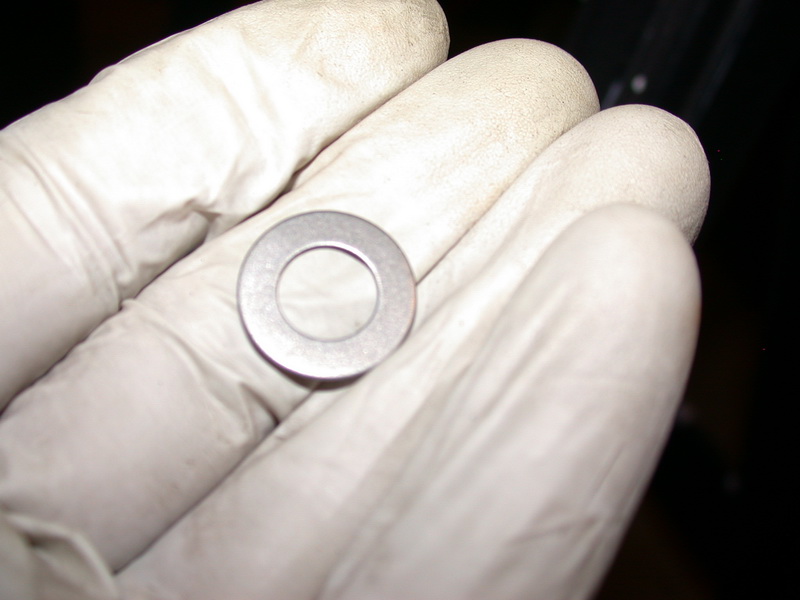 . So I put it in place on the pin: . 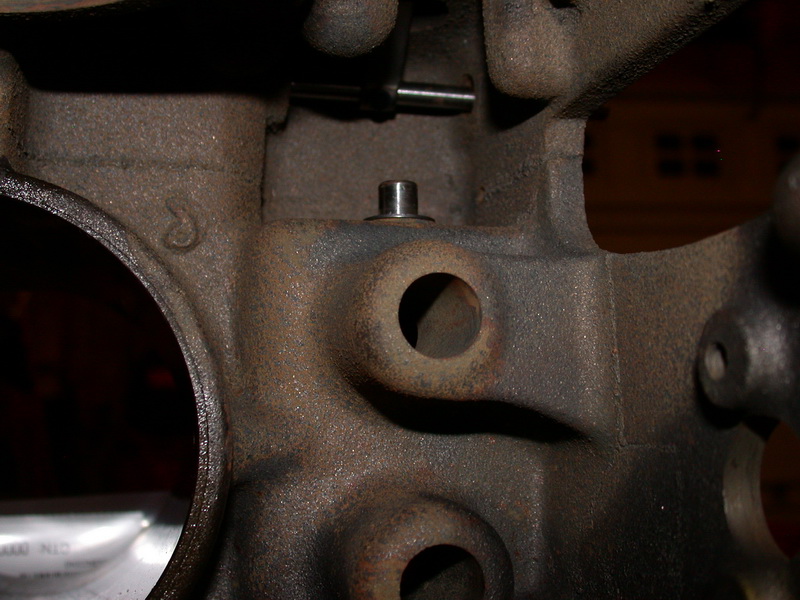 . Then pushed the lever up so there's room to get the governor gear in place: . 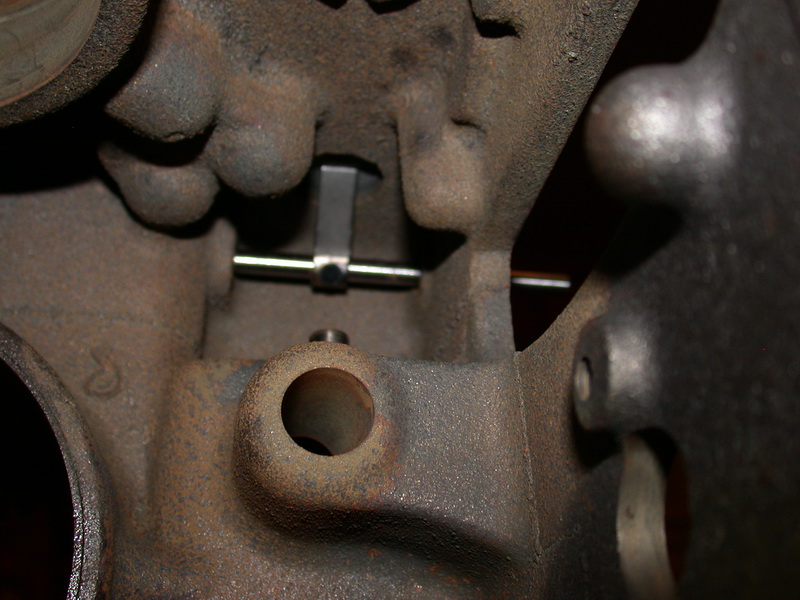 . And installed the gear: . 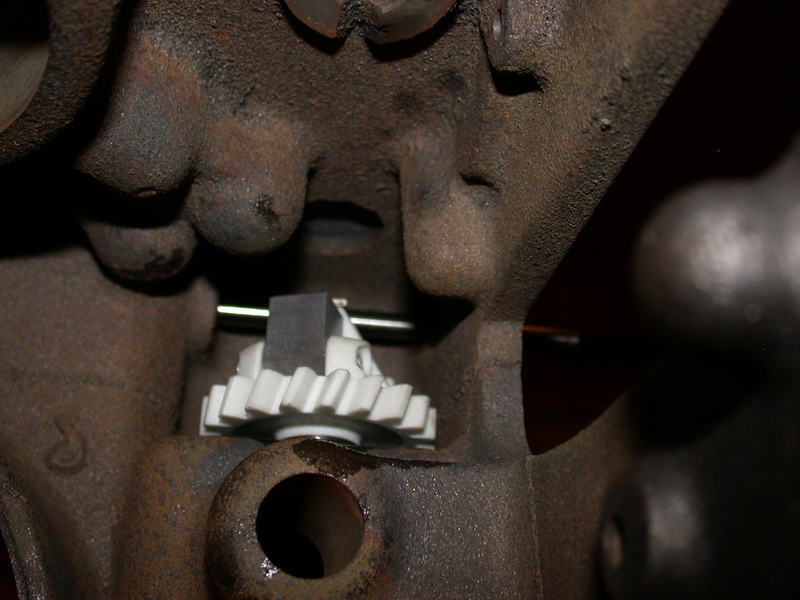 . Next this spacer over the shaft from the outside: . 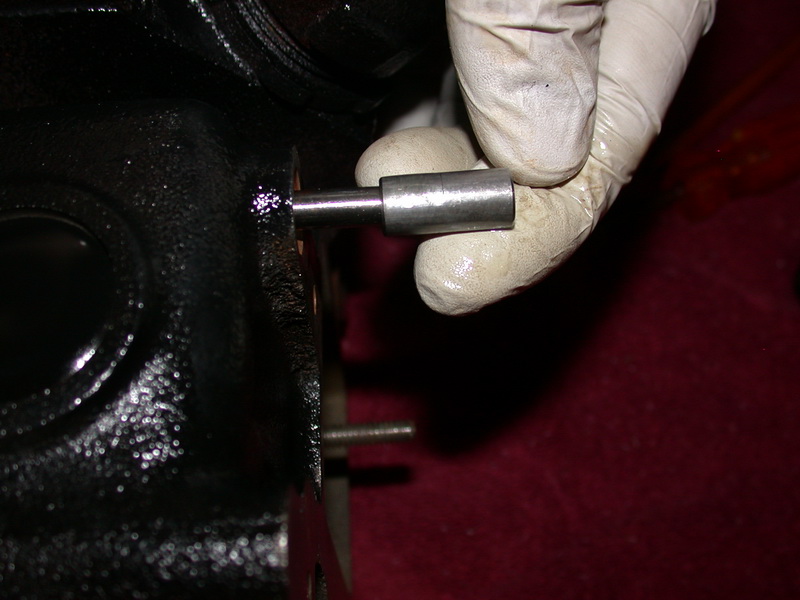 . And then the bushing. . 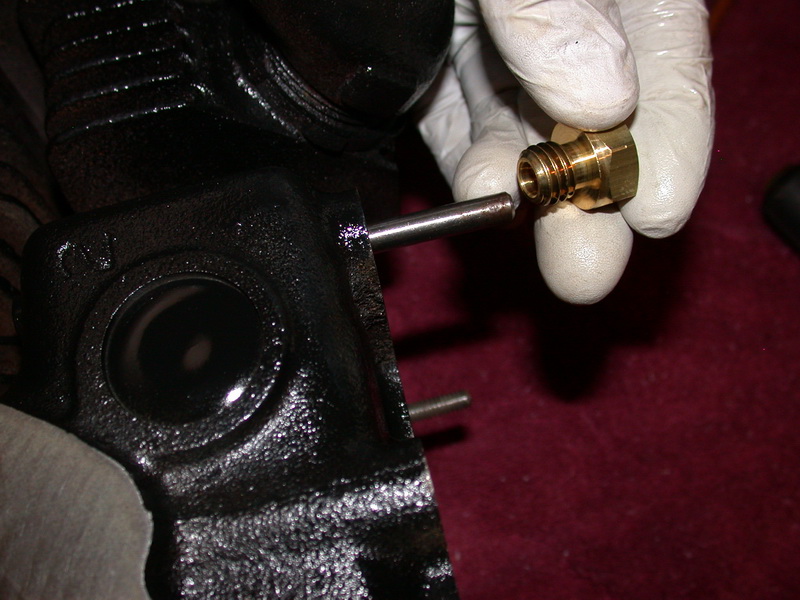 . The service manual shows a "plain washer" in here, but I don't see one in my disassembly pics. Again, I'll have to check the parts (I'll update this post after I do, it's late...) The bushing gets tightened to 100-120 inch lbs, per the manual. And that's as far as I got tonight. I haven't put the stop pin in yet. <edit 9/12/11 - Just now adding the pics of the stop pin> The stop pin and copper washer go in last: 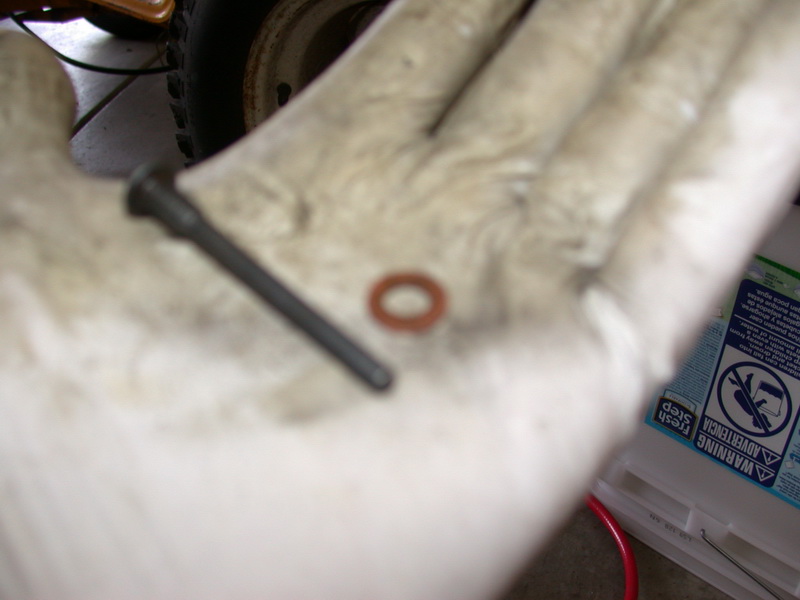 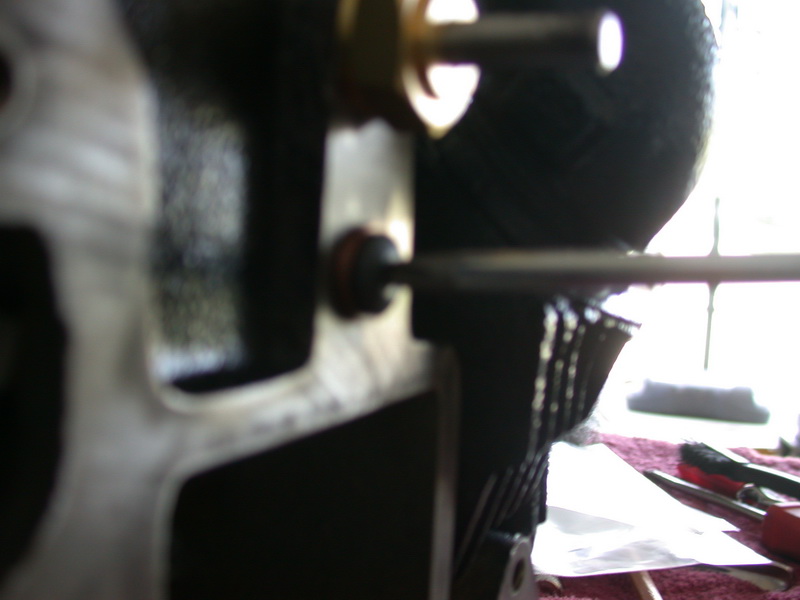 The manual mentions turning the gear to assure that the stop pin isn't hitting the weights. <End of 9/12/11 edit> This bit from the service manual confuses me: 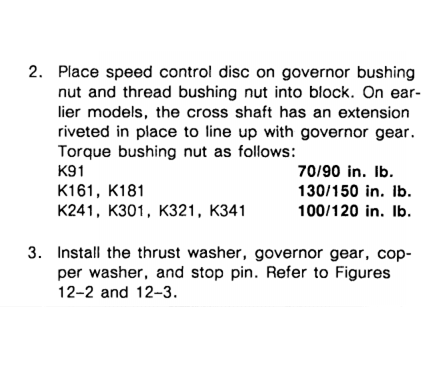 . I'm guessing they refer to the "plain washer" as a speed control disc here (?) And I don't know about this riveted extension - mine probably doesn't have it. And I'm guessing the "thrust washer" is the one I put on the pin under the governor gear. Just checking...
|
|
#330
08-23-2011, 09:07 AM
|
||||
|
||||
|
Quote:
They need to be open to get oil: 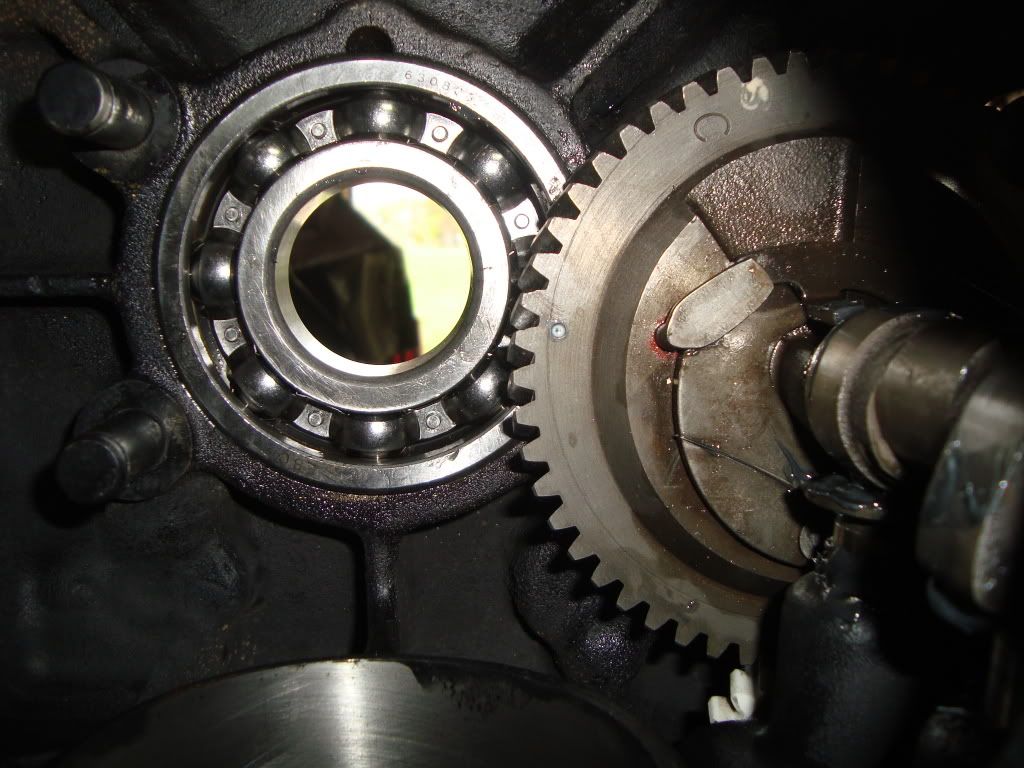
__________________
DWayne 1973: 128, ag tires, 3pt. lift, spring assist, lights, 42" Deck 10" moldboard plow 2016 XT1 42" deck 18HP
|
|
|
|
Cub Cadet is a premium line of outdoor power equipment, established in 1961 as part of International Harvester. During the 1960s, IH initiated an entirely new line of lawn and garden equipment aimed at the owners rural homes with large yards and private gardens. There were a wide variety of Cub Cadet branded and after-market attachments available; including mowers, blades, snow blowers, front loaders, plows, carts, etc. Cub Cadet advertising at that time harped on their thorough testing by "boys - acknowledged by many as the world's worst destructive force!". Cub Cadets became known for their dependability and rugged construction.
MTD Products, Inc. of Cleveland, Ohio purchased the Cub Cadet brand from International Harvester in 1981. Cub Cadet was held as a wholly owned subsidiary for many years following this acquisition, which allowed them to operate independently. Recently, MTD has taken a more aggressive role and integrated Cub Cadet into its other lines of power equipment.
This website and forum are not affiliated with or sponsored by MTD Products Inc, which owns the CUB CADET trademarks. It is not an official MTD Products Inc, website, and MTD Products Inc, is not responsible for any of its content. The official MTD Products Inc, website can be found at: http://www.mtdproducts.com. The information and opinions expressed on this website are the responsibility of the website's owner and/or it's members, and do not represent the opinions of MTD Products Inc. IH, INTERNATIONAL HARVESTER are registered trademark of CNH America LLC
All material, images, and graphics from this site are the property of www.onlycubcadets.net. Any unauthorized use, reproductions, or duplications are prohibited unless solely expressed in writing.
Cub Cadet, Cub, Cadet, IH, MTD, Parts, Tractors, Tractor, International Harvester, Lawn, Garden, Lawn Mower, Kohler, garden tractor equipment, lawn garden tractors, antique garden tractors, garden tractor, PTO, parts, online, Original, 70, 71, 72, 73, 76, SO76, 80, 81, 86, 100, 102, 104, 105, 106, 107, 108,109, 122, 123, 124, 125, 126, 127, 128, 129, 147, 149, 169, 182, 282, 382, 482, 580, 582, 582 Special, 680, 682, 782, 782D, 784, 800, 805, 882, 982, 984, 986, 1000, 1015, 1100, 1105, 1110, 1200, 1250, 1282, 1450, 1512, 1604, 1605, 1606, 1610, 1615, 1620, 1650, 1710, 1711, 1712, 1806, 1810, 1811, 1812, 1912, 1914.


 Linear Mode

