
|
PLEASE PATRONIZE OUR SPONSORS!


|
|||||||
 |
|
|
Thread Tools | Display Modes |
|
#101
 07-15-2011, 12:44 AM
|
||||
|
||||
|
Now it's time to "Split the Tractor" - I think that's a funny phrase. But anyway, here we go:
First I removed this speed control linkage that was just kind of hanging out to get it out of the way: . 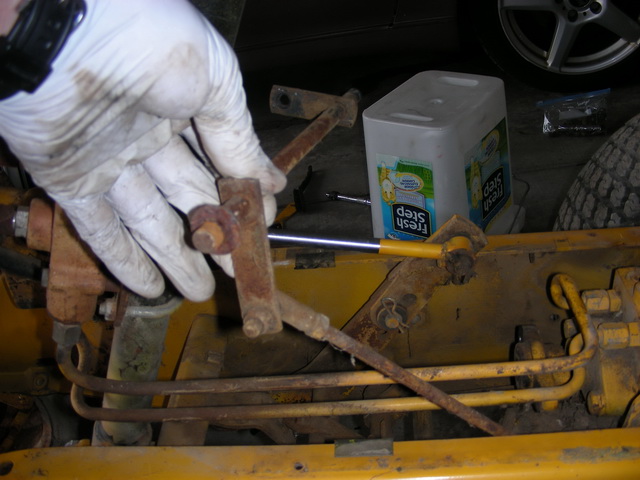 Then I removed the hydraulics from the steering column by taking off the U-bolts. I noted that it was mounted kind of cockeyed, and took pictures of it to remind myself of the angle. Is that a space-constraint thing, or was mine just that way? . 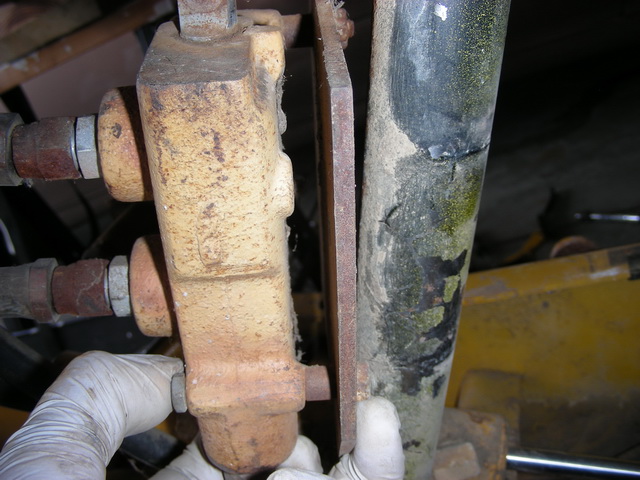 Then I removed the piston for the hydraulic lift: . 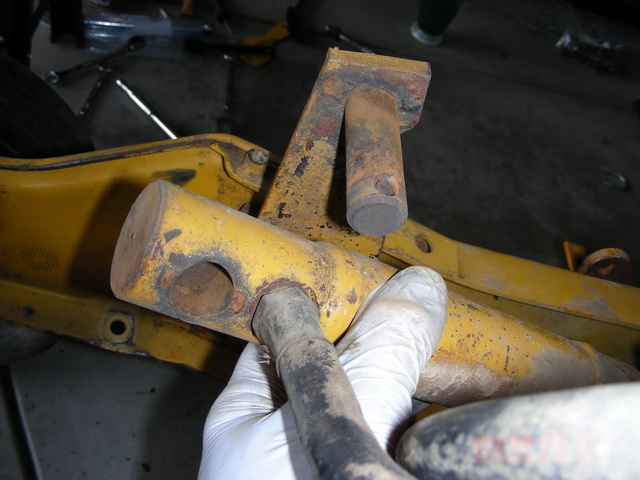 . 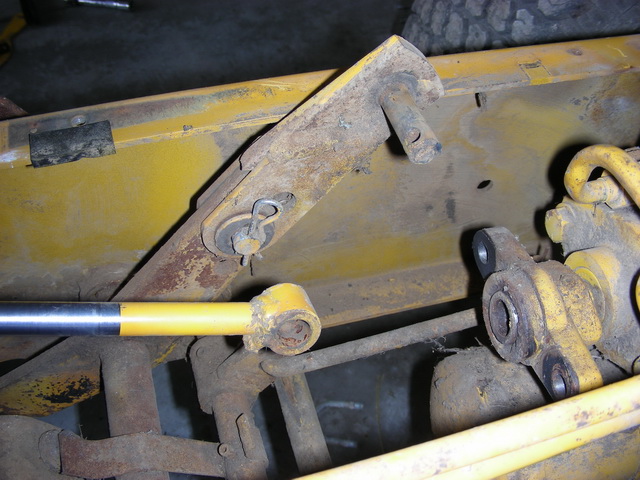 . Then disconnected the rod from the steering, and pulled the two bolts holding the steering column to the frame, and it's out: . 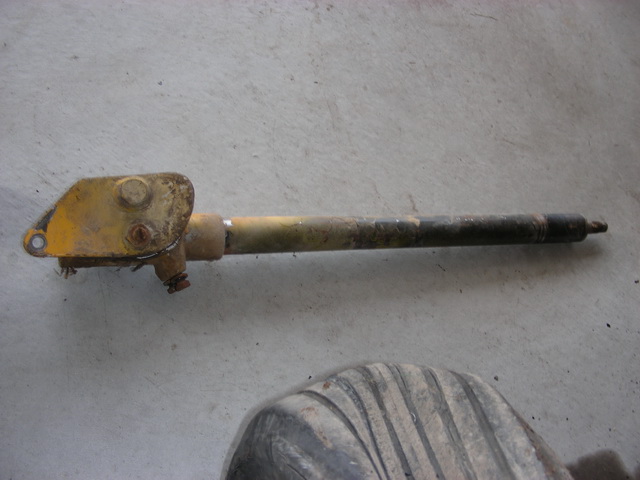 . Then I disconnected two linkages (can't name them, but here's pics) and a spring: .  . 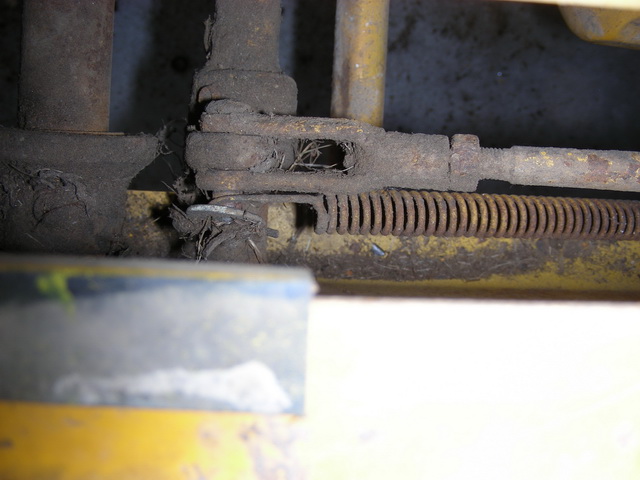 . Blocked up the front of the differential; . 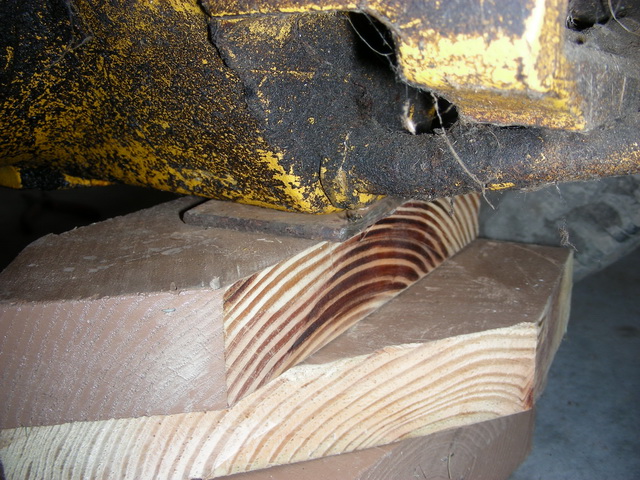 . Removed the two brackets and two more bolts from each side... . 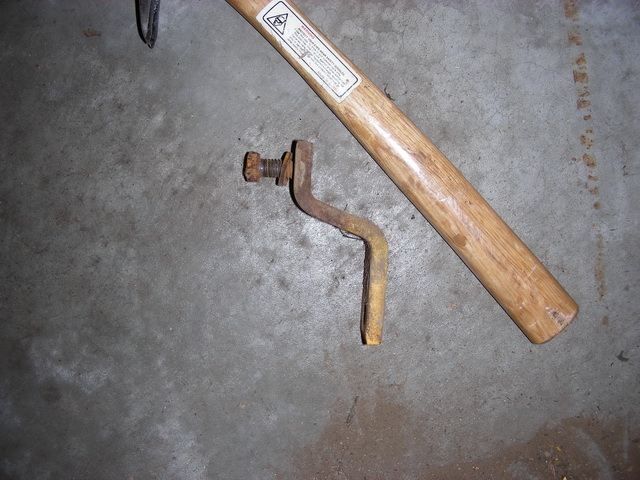 . 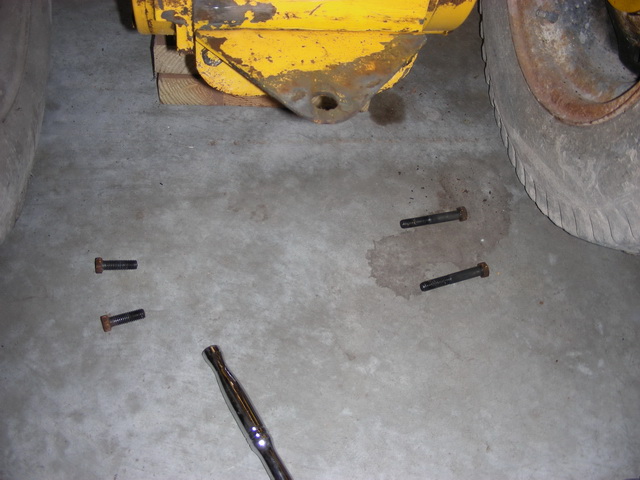 . And voila, we have a split tractor:  . At this point, I'm admiring the elegance in simplicity of these tractors. Such a big, powerful, long lasting tractor, and such simple assembly. I had a moment while cleaning out the engine area of the frame where I was feeling a bond with my 1650. I think I heard the big tractor purr from the care it was getting after all these years. 

|
|
#102
07-15-2011, 01:03 AM
|
||||
|
||||
|
And lastly for this evening, after some cleaning of the rear end, I put down some newspaper and pulled the hydraulic lines.
. 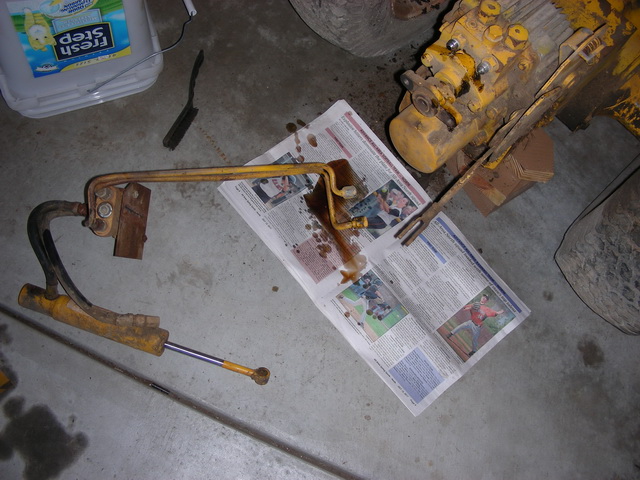 . Here's a look at the hydro oil. I don't have much experience evaluating this, but at least it ain't black: . 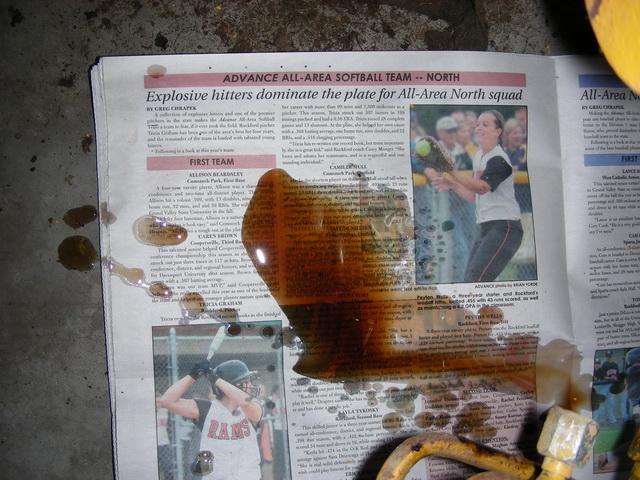 . I think I'd like to put some kind of cap nuts over those fittings just to keep dirt from getting in and / or oil from coming out. For now, I wrapped them in tape and pinched off the ends to keep dust out. And here is the offending part when it comes to the seized up forward/reverse/speed control. Right here at this pivot point, the thing was stuck like you wouldn't believe. .  . So I removed the assembly: . 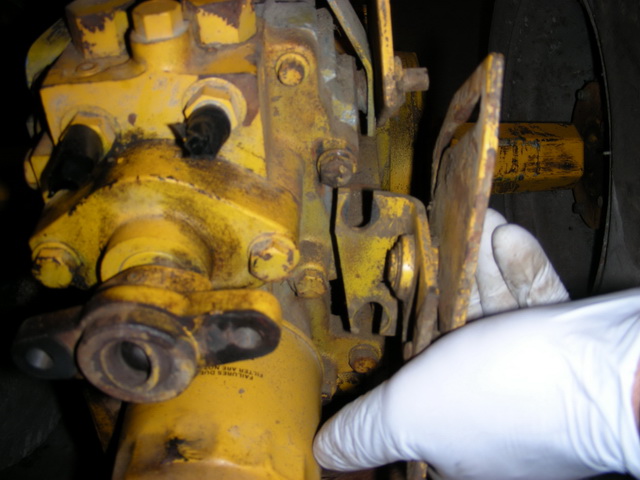 . And the snap ring from the backside: .  . And started working it to try and separate the two pieces. After banging on it for a while, I decided to let it soak overnight with penetrating oil.
|
|
#103
07-15-2011, 01:07 AM
|
||||
|
||||
|
Quote:
|
|
#105
07-16-2011, 02:02 AM
|
||||
|
||||
|
Quote:
After cleaning both up with a wire brush, they still want to go back together very tight. I haven't added grease or put them back together because they may as well stay apart for painting, but man - that's tight...
|
|
#106
07-16-2011, 10:59 AM
|
||||
|
||||
|
I'm reading the service manual and trying to determine what all I should do with the rear end while I have the tractor broken down.
Anyone with some tips on the most important things, please chime in! A couple questions in the early running: 1) Both of my rear wheels have the air valve on the inside of the wheel. What's going on with that? I haven't taken the wheels off yet, but it doesn't look like the wheels have been reversed at first glance. 2) I've noticed when I rotate the whole thing by turning both wheels in opposite directions slightly, the axles will move in and out about 1/8". Bad? Normal? 3) Looking at the service manual, I see they went with two flex discs at the rear (after my tractor's production, because I only have one.) Is this a weak point that should be addressed? I'd imagine you'd need a shorter drive shaft to go with two discs, right? 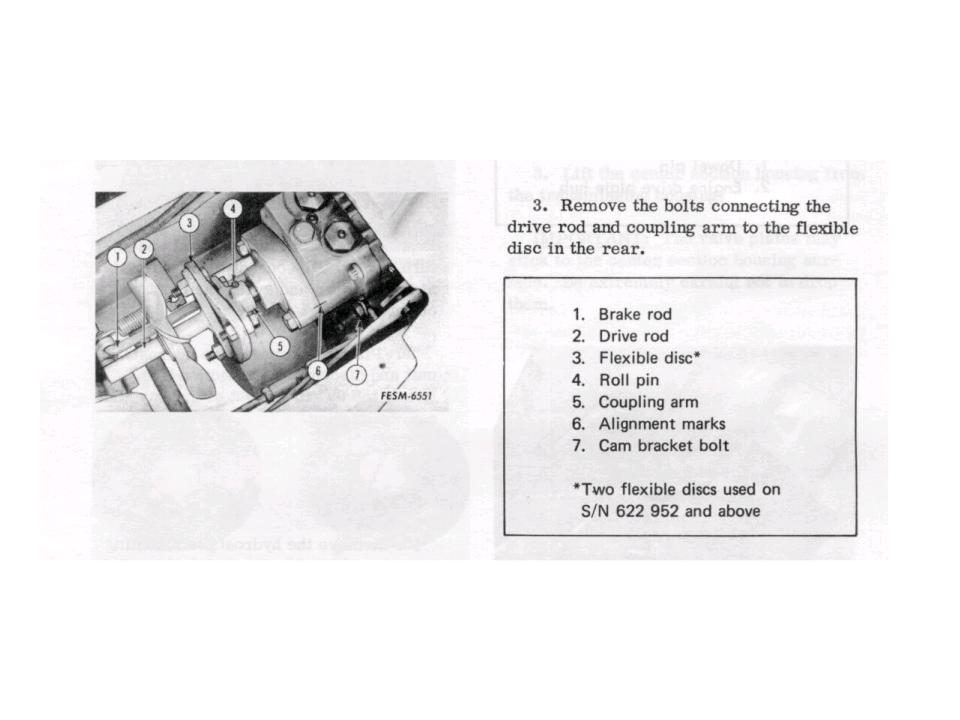 This rear end seems like the most complex and daunting part of the project...
|
|
#107
07-16-2011, 11:01 AM
|
||||
|
||||
|
Wow Man, seems like your really enjoying yourself with this project! that Bond that you felt with your tractor... youve got yellow fever and there isnt any cure. I can totally understand what your saying
 as for the hydro linkage, those parts that are still really stiff. a wire brush isnt really sufficient. use coarse emery cloth or sandpaper, and keep working up the grits until it is perfectly smooth and very shiny. if you can, take one of those inside wire brushes, the type plumbers use, that work inside a pipe before you solder it, cut it off at the handle and stick it in a drill. that will help shine up the inside surface of the one part. once you got everything nice and shiny, it should pivot a little easier. Good luck and thanks for the pics! as for the hydro linkage, those parts that are still really stiff. a wire brush isnt really sufficient. use coarse emery cloth or sandpaper, and keep working up the grits until it is perfectly smooth and very shiny. if you can, take one of those inside wire brushes, the type plumbers use, that work inside a pipe before you solder it, cut it off at the handle and stick it in a drill. that will help shine up the inside surface of the one part. once you got everything nice and shiny, it should pivot a little easier. Good luck and thanks for the pics!
__________________
Tyler Chiliak. Southeast Alberta Canada. My dad and I own, 1650, , 1450, 1250, 1250, 1200, 982, 782, 149, 149, 149, 128, 128, 123, 100, 100. Also a 1310, 1500, and 2 1600 IHC trucks.
|
|
#108
07-16-2011, 11:06 AM
|
||||
|
||||
|
the reason the the tires have the air valves on the inside, is that your rims are not stock....
your axels will have some play like that, it isnt too big of a deal, when it reaches 1/4" or even 1/2" then you have a problem. when you take the rear cover off to drain the oil, then I will explain where the play occurs and how to fix it. As for your other question, I'm sorry I cant answer that, I'm not really sure what the difference is between the serial number breaks and how that affects the drivshaft assembly. Looks like your making great progress.
__________________
Tyler Chiliak. Southeast Alberta Canada. My dad and I own, 1650, , 1450, 1250, 1250, 1200, 982, 782, 149, 149, 149, 128, 128, 123, 100, 100. Also a 1310, 1500, and 2 1600 IHC trucks.
|
|
#109
07-16-2011, 11:48 AM
|
||||
|
||||
|
Thanks Tyler. I'm getting ready to remove the rear cover soon.
So on that pivot point on the linkage, is it OK if I work it to the point that it spins freely? I don't want to over-do it in case it needs to have some kind of resistance to it.
|
|
#110
07-16-2011, 11:52 AM
|
||||
|
||||
|
Of course the rear end has the usual oily crud all over it after all these years. What all do I need to buy to get everything sealed up like new?
I ordered the gasket that goes between the hydro and the diff from the dealer today. He has the rear cover gasket in stock, so I'll pick both of those up next week. I'm guessing I'm going to want to pull the axles and check out those seals and bearings. Lots to learn there...
|
|
|
|
Cub Cadet is a premium line of outdoor power equipment, established in 1961 as part of International Harvester. During the 1960s, IH initiated an entirely new line of lawn and garden equipment aimed at the owners rural homes with large yards and private gardens. There were a wide variety of Cub Cadet branded and after-market attachments available; including mowers, blades, snow blowers, front loaders, plows, carts, etc. Cub Cadet advertising at that time harped on their thorough testing by "boys - acknowledged by many as the world's worst destructive force!". Cub Cadets became known for their dependability and rugged construction.
MTD Products, Inc. of Cleveland, Ohio purchased the Cub Cadet brand from International Harvester in 1981. Cub Cadet was held as a wholly owned subsidiary for many years following this acquisition, which allowed them to operate independently. Recently, MTD has taken a more aggressive role and integrated Cub Cadet into its other lines of power equipment.
This website and forum are not affiliated with or sponsored by MTD Products Inc, which owns the CUB CADET trademarks. It is not an official MTD Products Inc, website, and MTD Products Inc, is not responsible for any of its content. The official MTD Products Inc, website can be found at: http://www.mtdproducts.com. The information and opinions expressed on this website are the responsibility of the website's owner and/or it's members, and do not represent the opinions of MTD Products Inc. IH, INTERNATIONAL HARVESTER are registered trademark of CNH America LLC
All material, images, and graphics from this site are the property of www.onlycubcadets.net. Any unauthorized use, reproductions, or duplications are prohibited unless solely expressed in writing.
Cub Cadet, Cub, Cadet, IH, MTD, Parts, Tractors, Tractor, International Harvester, Lawn, Garden, Lawn Mower, Kohler, garden tractor equipment, lawn garden tractors, antique garden tractors, garden tractor, PTO, parts, online, Original, 70, 71, 72, 73, 76, SO76, 80, 81, 86, 100, 102, 104, 105, 106, 107, 108,109, 122, 123, 124, 125, 126, 127, 128, 129, 147, 149, 169, 182, 282, 382, 482, 580, 582, 582 Special, 680, 682, 782, 782D, 784, 800, 805, 882, 982, 984, 986, 1000, 1015, 1100, 1105, 1110, 1200, 1250, 1282, 1450, 1512, 1604, 1605, 1606, 1610, 1615, 1620, 1650, 1710, 1711, 1712, 1806, 1810, 1811, 1812, 1912, 1914.


 Linear Mode

