
|
PLEASE PATRONIZE OUR SPONSORS!


|
|||||||
 |
|
|
Thread Tools | Display Modes |
|
#1
 08-21-2009, 08:52 PM
|
|||
|
|||
|
Been having clutch problems on my 1200. Basically no matter how you adjust the clutch, it doesn't want to release when you push the pedal. I had a local shop put a new throwout bearing in a month or so ago, and I recently replaced the clutch release rod.
(I've been having clutch-dragging problems since I got this tractor a while back - the original owner had the mechanical aptitude of the average chimpanzee, and I've been finding lots of things just flat put together wrong!) I noticed on my 1000 that, with the clutch pedal locked down, there is a visible gap between the friction disk and the pressure plates. On my 1200, when you push the pedal down, no gap appears. I pulled the shaft and clutch assembly out of the tractor tonight, and drove the front roll pin out that holds the forward pressure plate on. I am thinking that there should be some sort of spring in there to push the pressure plates apart when the clutch arm pulls the throwout bearing back. Is that the case? In the exploded views in the parts manual, the diagram makes it look like the teaser spring is between the clutch arm and spring spacer, but if that's the case I can't figure out what it does. Anyway, does the teaser spring go between the two pressure plates? Is its function to push the pressure plates apart to release the clutch? 
|
|
#2
08-21-2009, 10:31 PM
|
|||
|
|||
|
tpelle - I just went through this with a 128. The diagrahm is wrong. The teaser spring goes next to the pressure plate and the spacer is what contacts the throwout bearing. If it is the same spacer with the shoulder on one end and the bell on the other the shoulder goes toward the bearing and the spring goes into the bell and against the presure plate. I just finished having to pull a clutch three times to get this right.
Hope this helps, Wayne
|
|
#3
08-22-2009, 08:08 AM
|
|||
|
|||
|
wshytle, thanks for the reply. I'm still not sure, though, from you description if the teaser spring goes between the two pressure plates so as to push them apart, or if it goes between the spacer and the rear-most pressure plate.
So, is the order of assembly starting at the throwout bearing and working forward: 1 - throwout bearing, 2 - clutch arm, 3 - spacer, 4 - teaser spring, 5 - rear pressure plate, 6 - clutch friction disk, 7 - front pressure plate? or 1 - throwout bearing, 2 - clutch arm, 3 - spacer, 4 - rear pressure plate, 5 - clutch friction disk AND teaser spring, 6 - front pressure plate? I'm thinking now that it's the first example, but the problem is that, when the arm pulls the throwout bearing back, the spacer isn't being pushed back by the teaser spring. I looked at my 1000 again, and the teaser spring is visible between the rear pressure plate hub and spacer when the clutch is pushed. Any idea why the spacer isn't moving back on the 1200? Edit: Here's what I'm thinking is wrong: Back about a month ago I was recuperating from a broken knee, and was in a leg brace and on crutches - basically out of commission in terms of doing any mechanical work. It so happened that the throwout bearing went out. Being laid up, I called a local shop to come get the tractor and replace the throwout bearing. Since then the clutch hasn't worked right, but I thought it may have been an adjustment issue. I fooled around with the old original clutch operating rod, and finally replaced it two days ago. Still couldn't get the clutch to work. So, where my thinking is headed is that, when the throwout bearing siezed, I bet the shaft got scored. Now, when the new throwout bearing compresses the pressure spring, and when the spacer is supposed to slide back on the shaft pushed by the teaser spring, the spacer isn't sliding. I think I'm going to have to strip the shaft down and see how bad it's boogered-up, and maybe polish the surface so the spacer will slide. (I noticed that, before I took it apart, I could see the throwout bearing pull back off of the spacer and could actually see shiny polished metal on the small end of the spacer. This isn't right! On my 1000, when the throwout bearing pulls back, the spacer follows it and you can't really see the small end of the spacer like that.) So, I'm going to mow the grass with the 1000 (thank God I have TWO Cub Cadets!), then I'm off to the hardware store for the fixin's to make a spring compression tool. Gonna get to the bottom of this yet!
|
|
#4
08-22-2009, 05:38 PM
|
||||
|
||||
|
teaser spring = curse word in my book. What a pain makes a good argument for going strictly hydrostatic.
__________________
I H Pushmower,100,104,124,1450,1650,782,982,154 LoBoy,185 LoBoy,2 Farmall A's , Farmall H, and 8 IH trucks
|
|
#5
08-23-2009, 12:57 AM
|
|||
|
|||
|
The teaser spring goes between the throw out bearing and the spacer and the rear pressure plate goes on in front of the spacer. There is nothing between the pressure plates except the clutch disk.
|
|
#6
08-23-2009, 01:57 PM
|
|||
|
|||
|
tpelle - The teaser sping goes against the pressure plate and into the bell end of the spacer. The shouldered end of the spacer goes against the throwout bearing. The shoulder is there to clear the arm. Believe me, I speak from very recent experience. The diagrahm I was going by showed the opposite but a fellow cubber told me about the error. I pulled my clutch for the third time (second was to go ahead and replace the pin driver bushing thinking that might be my problem) and after I got the order I described above it "worked like butta". While you have it out check the bushing in your clutch pin driver. If it's wallowed out any I'd replace it as well. They're cheap enough to go ahead with new. Also, before final assembly try the bushing on the end of the driveshaft and make sure it slides in easily. You may need a little emory cloth at this point. If so, a little grease on the bushing and finish putting her together. One last thing, when you get the clutch installed in the hanger slide the engine as close as you can get it to the end of the driveshaft and check for up and down matching. You may need to even get the clutch pins started a little. I had to add some washers (one on each side) to my hanger bracket to lower it a tad to correct this up/down thing and I think it really helped. I was having problems getting things to go together so I just studied it and found it that way. Good luck!
Yosemite Sam - You are correct about nothing being between the prssure plates but the clutch disc but you have the spacer and teaser spring backwards. I guess there are more than one wrong diagrahms and I wish this could be corrected but I do speak from recent experience as I said above. Once you see how the shouldered end of the spacer is there to allow room for the arm.
|
|
#7
08-23-2009, 06:27 PM
|
|||
|
|||
|
I have the three-book manual set, and in the clutch section they mention checking the teaser spring to see if it's in spec. But I can't find the spec anywhere.
How do I tell if this spring is "worn out"? Is there an overall uncompressed length or something I can check?
|
|
#8
08-23-2009, 06:47 PM
|
|||
|
|||
|
Quote:
Back to the teaser spring subject.... Link to a Service Manual: http://ccmanuals.info/pdf/86_1650service.pdf It was found in Only Cub Cadets Techinical area. Here is a picture of a Quiet Line (800-1000-1200) clutch: 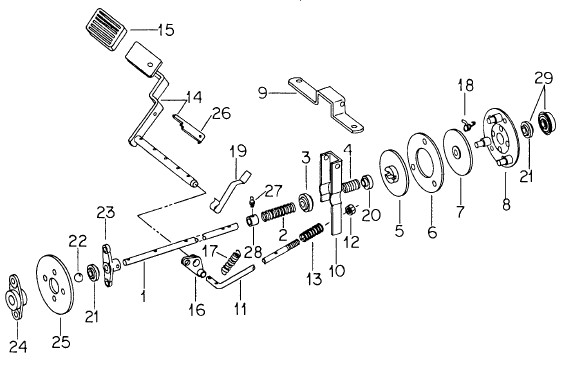 Part #4 goes in front of #20. Part #28 goes in front of #2. Page 2-23 of a Service Manual (http://ccmanuals.info/pdf/86_1650service.pdf) has the correct way the clutch components go. My Son's 86 (same as a 128) clutch components are the same way as shown with the exception the bushing (#5 in service manual). The correct way is (motor to trans): 1. Pressure Plate Locating Hub Assembly #7 2. Clutch Friction Disk #6 3. Pressure Plate Hub Assembly #5 4. Teaser Spring #4 5. Spring Spacer #20 6. Release Lever #10 7. Throwout Bearing #3 8. Lubricating Bushing (Serial Number 612808 & above) #28 9. Loading Spring #2 10. Washer (not shown-between loading spring and spiroid pin) 11. Coiled Spring Pin Areas to look for clutch hang up problems: 1. Wear in the throw out bearing area.  The drive shaft should be replaced if there is any wear in throwout bearing area. The throwout bearing must move freely. 2. Wear in hole that the pin goes between clutch release lever #10 and clutch lever hanger assembly #9. Excessive wear will cause the clutch not to work right. Check the area where the release lever #10 goes against the throwout bearing #3 for wear. Replace as needed. 3. The pressure plate assemblies (#5 and 7) need to be trued when you replace a clutch friction disk #6. 4. Driving plate assembly: If there is any wear/excessive play on the center bushing #21 (serial number 612807 and below) or bearing #29 (serial number 612808 and above) it needs replace. Check the spiroid pins for wear...replace as needed. 5. Quiet Line Cubs need to have good ISO mounts. Any play/movement in the motor can and will cause the clutch to out of line. I would add a brace between the motor rails to strenghten the ISO mounts. Check the holes in the oil pan where the motor mounts to the rails for bad threads.
|
|
#9
08-24-2009, 10:05 AM
|
|||
|
|||
|
Merk,
Thanks for the reply. The manuals that you linked to are exactly the ones I have. I'm putting together a spring compression tool to get this whole assembly apart, but I'm afraid that I'll find that my driveshaft looks like the one in your picture that you posted. I had an issue about two months ago while I was out of commission with a broken kneecap when the throwout bearing siezed. I bet it hogged out the shaft. Man, that's a $100 part! I'll see once I get it apart.
|
|
#10
08-24-2009, 01:23 PM
|
|||
|
|||
|
Here is my clutch spring compressor:
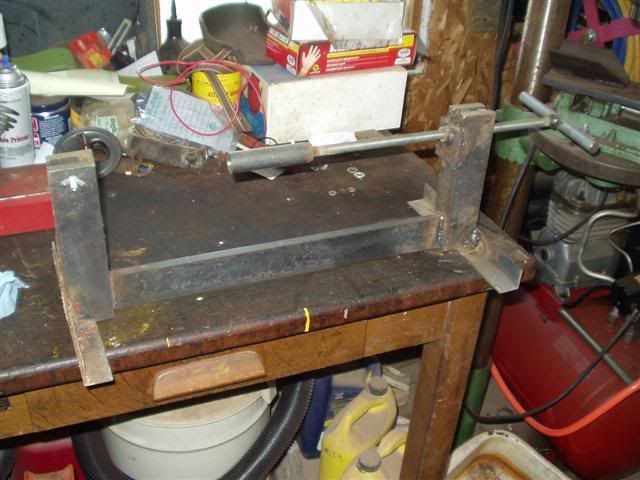  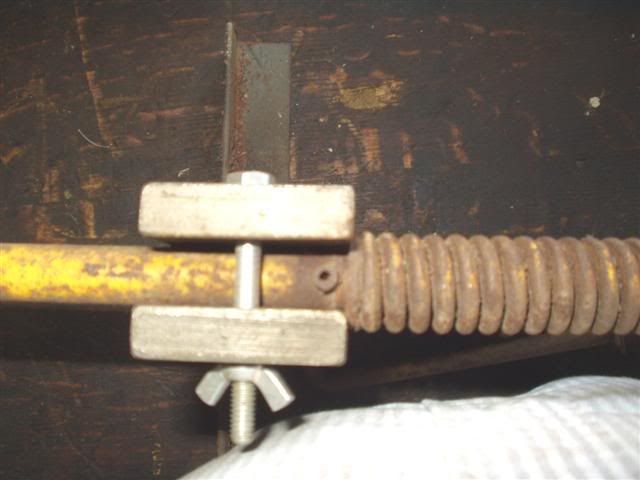 I compress the spring just enough to remove the spiriod pin. I use a coil pin punch that I purchase from Sears. Notice the tip: 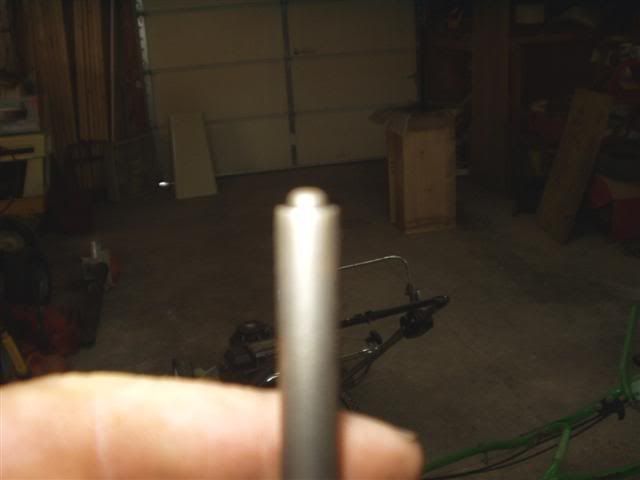 Matt G. made a different style clutch spring compressor. I make my own driveshafts. They are easy to do if you have a drill press.
|
|
|
|
Cub Cadet is a premium line of outdoor power equipment, established in 1961 as part of International Harvester. During the 1960s, IH initiated an entirely new line of lawn and garden equipment aimed at the owners rural homes with large yards and private gardens. There were a wide variety of Cub Cadet branded and after-market attachments available; including mowers, blades, snow blowers, front loaders, plows, carts, etc. Cub Cadet advertising at that time harped on their thorough testing by "boys - acknowledged by many as the world's worst destructive force!". Cub Cadets became known for their dependability and rugged construction.
MTD Products, Inc. of Cleveland, Ohio purchased the Cub Cadet brand from International Harvester in 1981. Cub Cadet was held as a wholly owned subsidiary for many years following this acquisition, which allowed them to operate independently. Recently, MTD has taken a more aggressive role and integrated Cub Cadet into its other lines of power equipment.
This website and forum are not affiliated with or sponsored by MTD Products Inc, which owns the CUB CADET trademarks. It is not an official MTD Products Inc, website, and MTD Products Inc, is not responsible for any of its content. The official MTD Products Inc, website can be found at: http://www.mtdproducts.com. The information and opinions expressed on this website are the responsibility of the website's owner and/or it's members, and do not represent the opinions of MTD Products Inc. IH, INTERNATIONAL HARVESTER are registered trademark of CNH America LLC
All material, images, and graphics from this site are the property of www.onlycubcadets.net. Any unauthorized use, reproductions, or duplications are prohibited unless solely expressed in writing.
Cub Cadet, Cub, Cadet, IH, MTD, Parts, Tractors, Tractor, International Harvester, Lawn, Garden, Lawn Mower, Kohler, garden tractor equipment, lawn garden tractors, antique garden tractors, garden tractor, PTO, parts, online, Original, 70, 71, 72, 73, 76, SO76, 80, 81, 86, 100, 102, 104, 105, 106, 107, 108,109, 122, 123, 124, 125, 126, 127, 128, 129, 147, 149, 169, 182, 282, 382, 482, 580, 582, 582 Special, 680, 682, 782, 782D, 784, 800, 805, 882, 982, 984, 986, 1000, 1015, 1100, 1105, 1110, 1200, 1250, 1282, 1450, 1512, 1604, 1605, 1606, 1610, 1615, 1620, 1650, 1710, 1711, 1712, 1806, 1810, 1811, 1812, 1912, 1914.


 Linear Mode

