 |
PLEASE PATRONIZE OUR SPONSORS!


|
|||||||
 |
|
|
Thread Tools | Display Modes |
|
#11
|
||||
|
||||
|
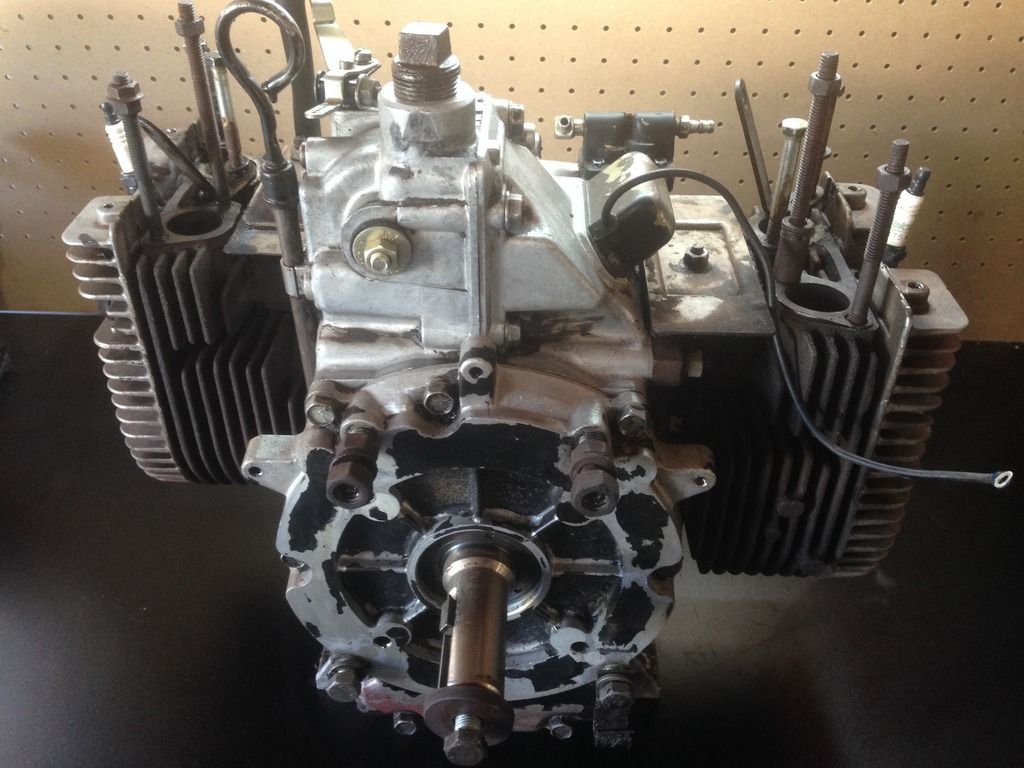
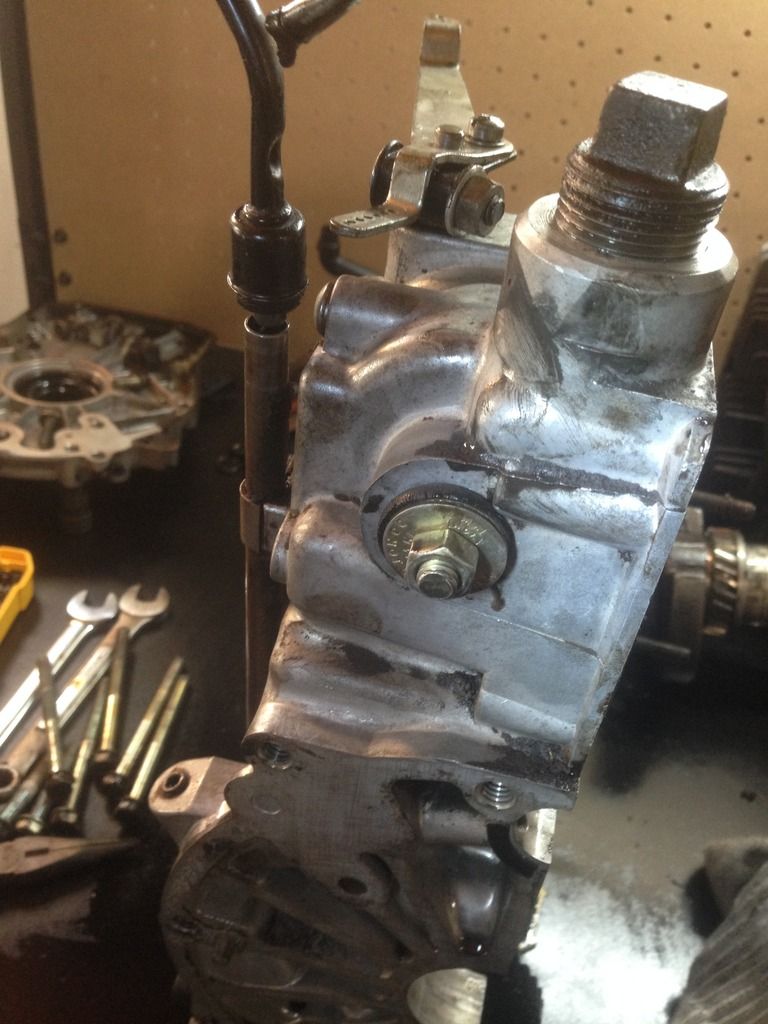
Whoaa!
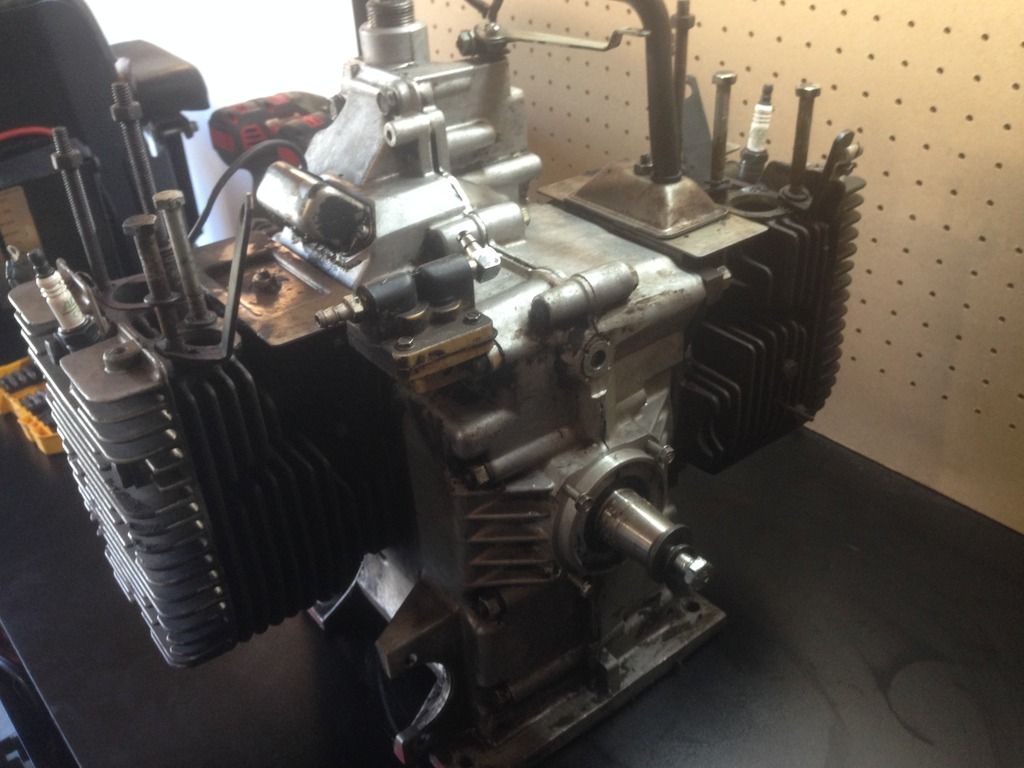
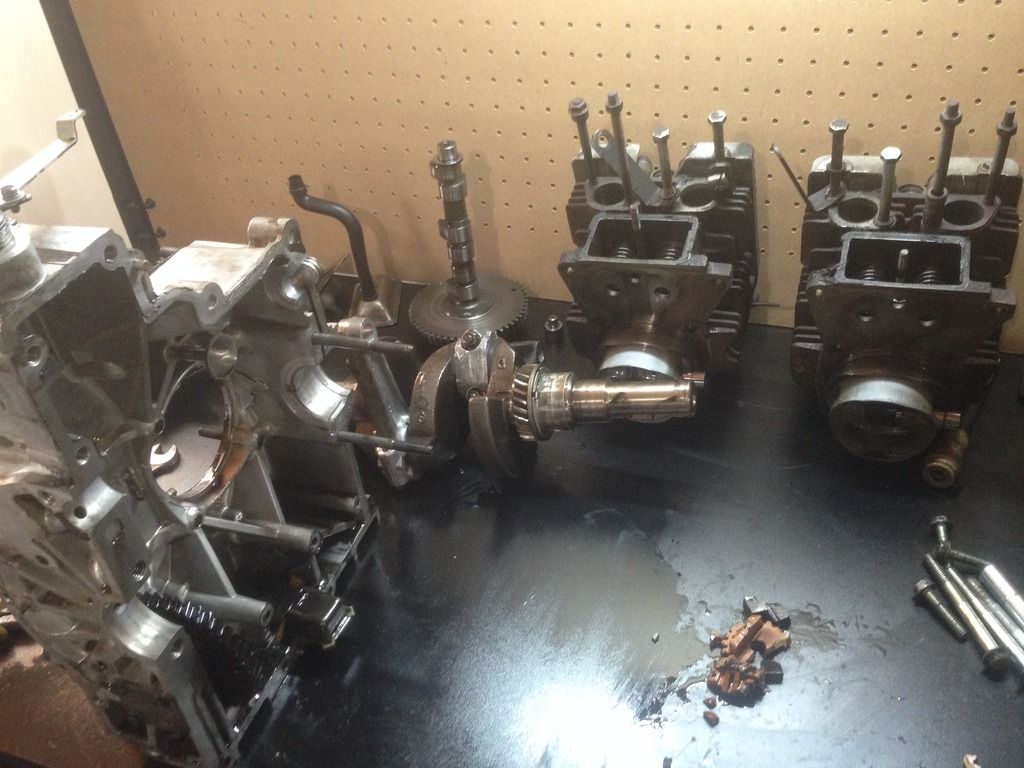
sum tin wong in China, looking @ that pix. Apparently some time in the past there was a governor problem as that stud/nut/washer does not belong there, located right under the fill plug location. no telling what you are going to find. FWIW: You can get away with leaving the heads on,----- after you unbolt the jugs, carefully slide the pistons to the bottom of the travel just enough to remove the circlips holding the wristpins in the pistons. Then gently tap the pins out, leaving the pistons in the cylinders. Also be sure to keep track of the lifters location in the block insuring their correct replacement upon reassembly. Although the lifters are made the same length @ factory, they wear to the cam as well as sometimes they differ in length. keeping them in order prevents you from messing with the valves. All that said, As far as you're going, if it were me, I would do the valves and address any cylinder wear or other issues,as well as removing carbon build up. |
|
#12
|
||||
|
||||
|
Quote:
__________________
Tim Pap's 100 Restored 108 1211 Dual Stick 1050 Pap's 100 restoration thread - http://onlycubcadets.net/forum/showthread.php?t=47965 |
|
#13
|
||||
|
||||
|
That's interesting! I was wondering what was gonna be on the other side but I didn't know it wasn't supposed to be there at all!
 people do some crazy thing I figured it was apart before do to the way it was in the tractor. I wonder if a rod could have flew apart and damaged the casing at one point or they added it to hold the gear in place whatever the case it didn't work. I get done with work a little early today so hopefully I can split the case tonight people do some crazy thing I figured it was apart before do to the way it was in the tractor. I wonder if a rod could have flew apart and damaged the casing at one point or they added it to hold the gear in place whatever the case it didn't work. I get done with work a little early today so hopefully I can split the case tonight 
|
|
#14
|
||||
|
||||
|
Those Gov shafts were known in some instances to fall out of their engine bores.
it was a combination of the spec. was on the small side of the shaft, and the bore was on the large side of the spec. tolerance. Throw in a dab of high engine heat and they just popped out, didn't happen a lot, but was not unheard of. looks like someone made some modification of some sort either to keep it in or who knows???? You will know soon enough. There is a service bulletin where a simple fix was to drill a small hole in the side of the bore boss, and install a roll pin, thus keeping the shaft in the block. I do any engine that I come in contact with, just because it is simple and keeps the shaft @ home,----- kind of like leashing yer dawg. 
|
|
#15
|
||||
|
||||
|
Ok so I got it split! First off the gear was in pieces at the bottom. My best guess is the gear blew apart and some how the plug that is there fell into the case. So someone put a freeze plug to keep the oil from coming out! This motor has probably blown up in the past due to some damage from the inside of the casing. It would have been nice if they would have put a new gear in then maybe it wouldn't have come apart! But I probably wouldn't have got the tractor for cheap either
    
|
|
#16
|
||||
|
||||
|
|
|
#17
|
||||
|
||||
|
|
|
#18
|
|||
|
|||
|
I imagine the hole that was JB welded was from the governor gear. Then the machine was sold.
|
|
#19
|
||||
|
||||
|
That looks about right!! It's right below where the governor sits and the jb weld was from the outside.
|
|
#20
|
||||
|
||||
|
IIRR that gov shaft is not available, but not sure
is it usable? Is it snug in the bore? if yes to both, you can reuse it and pin it. http://rich.homeunix.com/gravely/eng...lletin-246.pdf If you haven't downloaded the service manual do it!!! When you get around to assy the crankcase halves, I prefer Yamaha bond #4 The cases have to be cleaned with brake cleaner or lacquer thinner and be bone dry,---- use yer finger and apply a THIN coating to both surfaces, More is not better!! it will get into oil passages and stop up things. Follow the manual as to sealing points, a couple if missed will cause a leak. If you run into parts not avail, I usually go to ebay but some shops might have old parts in stock ( google is your friend) A lot of times, you can get a complete block on ebay less than $80 or so including oil pump & gov pin/gear. BTDT, since yours has had a grenade inside it, it might be a good idea. Carefully remove the rods for inspection of the journals, paying attention to orientation , best to mark them so they go back on same journals as well as same orientation. I like to mark them #1, #2 with an arrow toward the flywheel just so no mixup. also inspect for damage as something drove debris into the block. ok enough to keep you busy for a while 
|
 |
|
|
Cub Cadet is a premium line of outdoor power equipment, established in 1961 as part of International Harvester. During the 1960s, IH initiated an entirely new line of lawn and garden equipment aimed at the owners rural homes with large yards and private gardens. There were a wide variety of Cub Cadet branded and after-market attachments available; including mowers, blades, snow blowers, front loaders, plows, carts, etc. Cub Cadet advertising at that time harped on their thorough testing by "boys - acknowledged by many as the world's worst destructive force!". Cub Cadets became known for their dependability and rugged construction.
MTD Products, Inc. of Cleveland, Ohio purchased the Cub Cadet brand from International Harvester in 1981. Cub Cadet was held as a wholly owned subsidiary for many years following this acquisition, which allowed them to operate independently. Recently, MTD has taken a more aggressive role and integrated Cub Cadet into its other lines of power equipment.
This website and forum are not affiliated with or sponsored by MTD Products Inc, which owns the CUB CADET trademarks. It is not an official MTD Products Inc, website, and MTD Products Inc, is not responsible for any of its content. The official MTD Products Inc, website can be found at: http://www.mtdproducts.com. The information and opinions expressed on this website are the responsibility of the website's owner and/or it's members, and do not represent the opinions of MTD Products Inc. IH, INTERNATIONAL HARVESTER are registered trademark of CNH America LLC
All material, images, and graphics from this site are the property of www.onlycubcadets.net. Any unauthorized use, reproductions, or duplications are prohibited unless solely expressed in writing.
Cub Cadet, Cub, Cadet, IH, MTD, Parts, Tractors, Tractor, International Harvester, Lawn, Garden, Lawn Mower, Kohler, garden tractor equipment, lawn garden tractors, antique garden tractors, garden tractor, PTO, parts, online, Original, 70, 71, 72, 73, 76, SO76, 80, 81, 86, 100, 102, 104, 105, 106, 107, 108,109, 122, 123, 124, 125, 126, 127, 128, 129, 147, 149, 169, 182, 282, 382, 482, 580, 582, 582 Special, 680, 682, 782, 782D, 784, 800, 805, 882, 982, 984, 986, 1000, 1015, 1100, 1105, 1110, 1200, 1250, 1282, 1450, 1512, 1604, 1605, 1606, 1610, 1615, 1620, 1650, 1710, 1711, 1712, 1806, 1810, 1811, 1812, 1912, 1914.