
|
PLEASE PATRONIZE OUR SPONSORS!


|
#1
 12-27-2013, 11:14 PM
|
||||
|
||||
|
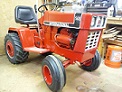
Finally have the time to pull the engine from my 1450 to diagnose the excessive oil consumption. Here are some pics. Haven't mic'd the cylinder yet, but there is quite a gap between the piston and the cylinder wall at the bottom of the stroke on the valve/carb side of the cylinder. Several of the head bolts were pretty loose, too, so it's definitely time for some work.
The cylinder is not scored anywhere that I can see, but there is a lot of oil on top of the piston, and this is just from running it up from the storage building up to the workshop, a couple hundred yards. I think it's just the piston that is worn. It was burning 8-12 oz per hour--in other words I was was adding a pint every time I cut the grass! Talk about a smoke screen! I found a machine shop in town (NAPA shop/Richmond) that can machine the block. So I've got to tear it down to the bare block, and that will be a new experience for me. I've replaced a piston before, but never totally stripped a block. I may be posting some questions as I make some progress on this. I'll post the results of my cylinder measurements once I get the piston out. I'd be interested in any tips/tricks that you guys can recommend for things to definitely look out for or change as I reassemble. I'll buy a rebuild kit off ebay once I find out the proper piston size (if it needs to be bored). If it has balance gears, I'll remove them, but not sure these engines even have them. I'll see when I get the oil pan off. What upgrades would you recommend?   
__________________

|
|
#2
12-28-2013, 09:10 AM
|
|||
|
|||
|
Well, you are one step ahead of me! At least it looks like all your head bolts came out w/o busting any! I just did a 14HP last spring. The machine shop (NAPA) and parts bill total was $233 and they had to remove 1 broken bolt.
Inspect your oil pan closely for stripped threads, cracks and worn mounting pads. I had mine milled flat and added flat washers to get it back up to where it belongs. This would be a great time to upgrade to a cast iron pan if yours happens to be in bad shape. Have your shop check for proper cam shimming and run-out. I have been told that is the source for the "Kohler Knock" which I have in mine as well as a 1250 that is next in line for re-hab. Keep us posted!! and good luck!
|
|
#4
12-29-2013, 09:31 AM
|
||||
|
||||
|
You may be right, but the pictures can be deceiving--the cylinder walls are like a mirror and there are lots of reflections in the pictures that look like defects in the cylinder walls that are not there. I haven't measured it yet, so it may be out of round or otherwise worn, but it's not scored or damaged.
__________________
|
|
#5
12-29-2013, 04:10 PM
|
|||
|
|||
|
Quote:
|
|
#6
12-29-2013, 08:14 PM
|
||||
|
||||
|
I got the engine dis-assembled tonight, and mic'd the bore at 3.502 to 3.503, so it's at the wear limit. Very light scoring (can't feel with fingernail, but visible with a raking light). Somewhat egg shaped.
The piston is very interesting. See pics. How does the top edge of the piston get damaged like? The block's going to the machine shop tomorrow.    
__________________
|
|
#7
12-30-2013, 03:25 AM
|
|||
|
|||
|
Well, I wondered about the piston being scored like that.... but couldn't tell if it was just an anomaly in your earlier pics, or if it was really there.
The piston damage, was caused by compression/hot combustion gas going past the rings. Severe blow by. What happens is, after ignition, the hot air/ or the flame-front actually goes between the piston rings and the cylinder wall. That causes the edge of the piston to get very, very hot. Then it just erodes it away like a blow torch. That erosion was on the valve side of the piston because that is where the plug is and ignition starts. It was running a little rich, and I'd say just a little out of time. Lugging usually plays a role in this type of damage also. From these recent pics, we can also see, that not only was the first ring not sealing, neither was the second. (It's not really designed to, and won't handle doing the first rings job for very long.) The piston skirt is dark brown/black from the leaking compression and oil being "cooked" on it from the heat. Couple of things I'd check, (this is from what I see in the pics): *Rod journal on the crank is probably egg shaped on the "power" side. I hope you had planned to grind it. *In one pic the cam looks blue near the exhaust lobe. May have gotten hot. Look it over good, and mic it. I'd like to see some pics of: The bore now that the piston is out The valves The valve seats The connecting rod journal end with the cap off A shot of the piston looking at it from the side where the erosion is. Looks like there is some damage to the skirt on the side of the erosion. May just be wear, but it looks like it had some pretty good "piston slap". I will say, that motor was close to scoring the piston and locking up. Probably didn't just because the piston was so loose in the bore.
|
|
#8
12-30-2013, 10:18 AM
|
||||
|
||||
|
Thanks, JMech, let me know what you think. I don't have a good mic to check the rod journal, so I'll let the shop check that. The lobes on the cam look OK to me, not sure what that discolored spot is from, maybe original grinding? Here are the requested pics.
       
__________________
|
|
#9
12-30-2013, 11:47 AM
|
|||
|
|||
|
The wear on the top part of the piston is normal for a hi hour Kohler engine. Most Kohlers I rebuild have some of the scoring around the exhaust valve area on the piston.
__________________
Project Uncle Dick Cub Cadet 70 http://www.onlycubcadets.net/forum/s...ght=Uncle+Dick
|
|
#10
12-30-2013, 12:49 PM
|
|||
|
|||
|
Wow, you got the good out of that motor!
The valves and seats are shot. The machine shop shouldn't have any problem replacing the seats. Get new valve guides too. With that much wear, I wouldn't even check them, I'd just replace. The cylinder will clean up nicely. I bet it takes at least .020 though. .010 might get it.... but I doubt it. It has been warm. Not necessarily overheated, just been a little hot. Side view of the piston looks like it should. What I thought I saw in the other pic isn't there in this pic. Rod wore good, just like it is supposed to. The machine shop will check the journal, but I'm sure it will be out of round. Cam is fine. Might clean it up good and post another pic, but I don't really see anything scary. Just for good measure, have the shop check the deck on the block and make sure it is good and flat. I'm sure it is, but I usually double check it to be sure, especially on a motor that has that much wear. You have got to be happy, that motor worked hard and lasted a long time! Do this rebuild right (which you are) and it will last you another 40 years! Good job so far! 
|
 |
|
|
Cub Cadet is a premium line of outdoor power equipment, established in 1961 as part of International Harvester. During the 1960s, IH initiated an entirely new line of lawn and garden equipment aimed at the owners rural homes with large yards and private gardens. There were a wide variety of Cub Cadet branded and after-market attachments available; including mowers, blades, snow blowers, front loaders, plows, carts, etc. Cub Cadet advertising at that time harped on their thorough testing by "boys - acknowledged by many as the world's worst destructive force!". Cub Cadets became known for their dependability and rugged construction.
MTD Products, Inc. of Cleveland, Ohio purchased the Cub Cadet brand from International Harvester in 1981. Cub Cadet was held as a wholly owned subsidiary for many years following this acquisition, which allowed them to operate independently. Recently, MTD has taken a more aggressive role and integrated Cub Cadet into its other lines of power equipment.
This website and forum are not affiliated with or sponsored by MTD Products Inc, which owns the CUB CADET trademarks. It is not an official MTD Products Inc, website, and MTD Products Inc, is not responsible for any of its content. The official MTD Products Inc, website can be found at: http://www.mtdproducts.com. The information and opinions expressed on this website are the responsibility of the website's owner and/or it's members, and do not represent the opinions of MTD Products Inc. IH, INTERNATIONAL HARVESTER are registered trademark of CNH America LLC
All material, images, and graphics from this site are the property of www.onlycubcadets.net. Any unauthorized use, reproductions, or duplications are prohibited unless solely expressed in writing.
Cub Cadet, Cub, Cadet, IH, MTD, Parts, Tractors, Tractor, International Harvester, Lawn, Garden, Lawn Mower, Kohler, garden tractor equipment, lawn garden tractors, antique garden tractors, garden tractor, PTO, parts, online, Original, 70, 71, 72, 73, 76, SO76, 80, 81, 86, 100, 102, 104, 105, 106, 107, 108,109, 122, 123, 124, 125, 126, 127, 128, 129, 147, 149, 169, 182, 282, 382, 482, 580, 582, 582 Special, 680, 682, 782, 782D, 784, 800, 805, 882, 982, 984, 986, 1000, 1015, 1100, 1105, 1110, 1200, 1250, 1282, 1450, 1512, 1604, 1605, 1606, 1610, 1615, 1620, 1650, 1710, 1711, 1712, 1806, 1810, 1811, 1812, 1912, 1914.


 Linear Mode

