
|
PLEASE PATRONIZE OUR SPONSORS!


|
|||||||
 |
|
|
Thread Tools | Display Modes |
|
#11
 07-03-2020, 04:12 AM
|
||||
|
||||
|
Quote:
On this Cub, the driveline was shot. Ten years ago replaced the complete driveline with a used one from a gas 782. Shorten the shaft and replace the rubber disc with new. At the time the ball bushing seem OK but learn it should always be replace. Believe this is the root of the rag joint vibration issue. Did a complete repair on my other Cub 2 three years ago and it still runs smooth as silk. With Jeff’s adapter kit, I could always switch to CV driveline if need to. What best model CV driveline to look for? May do this on Cub2 the next go around. Plan to go with spline shaft. Thanks To Matt G. for the idea. Not sure if he did this mod on his plow tractor. Appreciate all the comments... Bob G. 
|
|
#12
07-03-2020, 05:40 AM
|
||||
|
||||
|
Finish extending the JD 318 steering column shaft with a 14” length of 3/4” ID mechanical tubing. There was a 0.004 interference fit so bore out each end 3” with 3/4 drill bit. The 1/4” drilled holes are used to plug weld the shaft to the tubing.
Working on finishing up the steering pump bracket. Jeff sent an email that adapter kit is in the mail. Decided to go ahead and replace all the o-rings in the pump to do this once. Best price found was at Messick for $60. Personally most O-ring kits are rip off on cost but guess OK for convenience. Most common problem is the shaft seal leaking and filling the column with oil. You just need replace this seal without disassembling the stack. Believe some one mention the original o-ring has been upgraded to a quad ring. Will see. Will note the size and McMaster#. This is my note... Seal Kit Cub $114 JD $83 Messicks $56 JOhn Deere# AM107078 Parker part # SK000097 Messicks O-Ring Kit, Part# 21-SK000011 (Steiner) for Parker HGF pump/valve Messicks Spring Kit, Part # 21-401443X1 (Steiner) for Parker HGF pump/valve Also thinking about repainting the frame since engine is out. I can see some yawning with all detail but want help others who may feel timid doing this type of project. It also shows what can be done with having the tooling. Only if I had a vertical mill and an AC/DC TIG welder I would be set... lol
|
|
#13
07-04-2020, 12:46 AM
|
||||
|
||||
|
Was surprised today to see my package from Messick on the porch this morning. I only placed the order 18 hours ago. Was shipped via FedEx.
The order was for the Parker HGF PS pump/valve oring seal kit, the RTV500 upper radiator hose and two spray cans of Kubota ‘Blue’ paint for the engine. Resealed the HGF today - destack the body one level at a time. Aware of springs popping out. Did not disassemble the metering valve assembly since did not see any signs of abnormal wear. Did found the steering shaft face seal having some wear. The face seal is not some standard item. Substitute a quad ring may work in a pinch- no guarantee though. All the sealing rings in the stack are flat/squared rubber rings. Assembling was going well until the last plate with the 3x 3/4” springs. One spring popped out three times. Used oring pick to hold spring in place while lowering the plate down on the stack then slowly easy pick out with slight pressure on the plate. Need to pay attention when reinstalling the valve plate. Valve plate needs to be correctly orientated to the port connections.
|
|
#14
07-04-2020, 07:41 AM
|
||||
|
||||
|
I might add if the 4 stack up thru bolts are loosened or removed, on a non leaking unit that has been in service, the unit will leak if all the "O" rings are not replaced, as the mating has been disturbed.
Deere, also most times stocks the "Jesus" springs for reasons I don't need to explain. Also when fumbling with them if they don't have a natural curve to them laterally, put one in them, in other words they are best not flat, but humped up like a willy worm if let lie on a table. that causes them to remain in place as you stack the assembly without them flying to places unknown. -----Beats the shit out of fumbling with 5 hands and several sets of feeler gauges trying to hold them in place during assembly.  I thought I'd tell you this AFTER you had your education dealing with them 
|
|
#15
07-04-2020, 09:51 AM
|
||||
|
||||
|
Good job. I didn't have any springs fly when I did mine but on the next one I do I will order the spring kit.
https://www.messicks.com/part/21-401443x1/spring-a
__________________
This ain't no hobby....it's an addiction
|
|
#16
07-04-2020, 12:39 PM
|
||||
|
||||
|
Thanks George and Oak,
After loosen the stack several times, though it be good idea to reseal it. Kept my hands wrapped around the stack while separating the plates. Did not have any surprises. If I had problems with all three spring, was going to use a putty knife to hold while lowering the plate. After deciding on using JD 318 valve, this was a good link I found to reference. https://www.mytractorforum.com/threa...n-pics.208848/ Parker instruction not clear on the check ball location under the port plate. I had it in the Aux port yesterday. Been bothering me last night since I did not get photo. Refer the above link and yup wrong location. Was wondering what piece of metal sticking out in the Aux port passageway. Bob G.
|
|
#17
07-05-2020, 07:57 PM
|
||||
|
||||
|
Was pleasantly surprise this Sunday afternoon with email from USPS that Jeff’s CV adapter kit was delivered to our mailbox. Walked out and sure enough there it was. Was waiting for these parts to do the final mockup before finish stripping frame to paint it.
Installed the adapter on the engine crank pulley and the hydro input shaft. The later Sundstrand hydros used what size spline input shaft? Cut the driveshaft for the final fit. Slide the previous cut coupler on shaft and temporary install with eight 1/4-20 x 1-1/4” Grade 5 bolt. Any one know is the proper hardware used for these coupler? I am thinking Grade 8 1-1/2” bolts. May have trim 1/4” off one or two bolts on the front adapter. Will lock-tite on threads on final install. The adapter plate on the Kubota engine was a little closer to steering valve (3/32”) than I planned. On steering valve cross mount bracket, the weld is broken on the left side of frame - believe this is a common problem. Going to remove stamped out wedge from the cross bracket which will increase the clearance. Also got the fan space from Jeff. Looking at proper mounting of the ten blade fan.
|
|
#18
07-05-2020, 08:16 PM
|
||||
|
||||
|
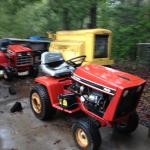
The fan and support bolt to the CV joint "over" the driveshaft.
From left to right, driveshaft, fan with support, CV joint, my pump adapter, pump.
|
|
#19
07-05-2020, 08:25 PM
|
||||
|
||||
|
The CV joints come with SHCS ( socket head cap screws). I have them in 1-3/4" and 2" lengths.
Also, if you need the OD of the engine adapter turned smaller, I can do that for the cost of return postage. You may need to grind a "flat" on each flat head screw and make sure they go back into the small hole you marked them for the flat.
|
|
#20
07-05-2020, 09:02 PM
|
||||
|
||||
|
If your pump is too close to the drive shaft you can offset it, as the steering shaft does not have to be straight/vertically to work.
All 3 of mine are offset to clear the driveshaft and are not noticeable during operation whatsoever.
|
|
| Tags |
| 782d, diesel, power steering |
|
|
Cub Cadet is a premium line of outdoor power equipment, established in 1961 as part of International Harvester. During the 1960s, IH initiated an entirely new line of lawn and garden equipment aimed at the owners rural homes with large yards and private gardens. There were a wide variety of Cub Cadet branded and after-market attachments available; including mowers, blades, snow blowers, front loaders, plows, carts, etc. Cub Cadet advertising at that time harped on their thorough testing by "boys - acknowledged by many as the world's worst destructive force!". Cub Cadets became known for their dependability and rugged construction.
MTD Products, Inc. of Cleveland, Ohio purchased the Cub Cadet brand from International Harvester in 1981. Cub Cadet was held as a wholly owned subsidiary for many years following this acquisition, which allowed them to operate independently. Recently, MTD has taken a more aggressive role and integrated Cub Cadet into its other lines of power equipment.
This website and forum are not affiliated with or sponsored by MTD Products Inc, which owns the CUB CADET trademarks. It is not an official MTD Products Inc, website, and MTD Products Inc, is not responsible for any of its content. The official MTD Products Inc, website can be found at: http://www.mtdproducts.com. The information and opinions expressed on this website are the responsibility of the website's owner and/or it's members, and do not represent the opinions of MTD Products Inc. IH, INTERNATIONAL HARVESTER are registered trademark of CNH America LLC
All material, images, and graphics from this site are the property of www.onlycubcadets.net. Any unauthorized use, reproductions, or duplications are prohibited unless solely expressed in writing.
Cub Cadet, Cub, Cadet, IH, MTD, Parts, Tractors, Tractor, International Harvester, Lawn, Garden, Lawn Mower, Kohler, garden tractor equipment, lawn garden tractors, antique garden tractors, garden tractor, PTO, parts, online, Original, 70, 71, 72, 73, 76, SO76, 80, 81, 86, 100, 102, 104, 105, 106, 107, 108,109, 122, 123, 124, 125, 126, 127, 128, 129, 147, 149, 169, 182, 282, 382, 482, 580, 582, 582 Special, 680, 682, 782, 782D, 784, 800, 805, 882, 982, 984, 986, 1000, 1015, 1100, 1105, 1110, 1200, 1250, 1282, 1450, 1512, 1604, 1605, 1606, 1610, 1615, 1620, 1650, 1710, 1711, 1712, 1806, 1810, 1811, 1812, 1912, 1914.


 Linear Mode

