
|
PLEASE PATRONIZE OUR SPONSORS!


|
|||||||
 |
|
|
Thread Tools | Display Modes |
|
#81
 07-11-2011, 09:13 AM
|
||||
|
||||
|
Yeah jsoluna, when I went to the Ace hardware this weekend, they said they didn't have Servalite parts, just Hillman. And then he told me that part number wouldn't mean anything to him. We then went over to the hardware aisle, and got two 7/16"x1/4"x1/16" bushings @ .80 each. I guess it's the same thing. I'll try to get them in today and assure that they're a good fit.
Didn't get much done over the weekend, it was just too hot. I got the 2X4 steering wheel puller mostly built, and I was just dripping sweat. Then my neighbor called and asked if we wanted to come down and hang out at the pool, and that was all she wrote... 
|
|
#82
07-11-2011, 09:41 AM
|
||||
|
||||
|
So instead of working, I did a lot of web surfing and daydreaming this weekend.
I'm really interested in updating my controls. Part of my fascination with a project like this is integrating the old with the new. Here are some of the ideas I'm working on: 1) A tachometer. Kirk Engines has one that looks great, although I'd really like to go with white-face gauges. It's going to be difficult to match them up. 2) A fuel gauge on the control panel. Looking into what it would take to put a sender in the plastic tank and a gauge on the dash. 3) I really like the Air/Fuel mix gauges. That would be great to always monitor the tuning. 4) Digital hour meter / volt meter All of this would require that I either go with three dial gauges and relocate the choke, or (while I'm doing the fiberglass work on the panel) go ahead and re-fab it for a 4-gauge arrangement. If the hour/volt meter is a small digital with no dial, I can stay with the three gauge arrangement and save some fab time. (edit: I also think an oil pressure gauge would be nice to have, haven't looked into this one yet - and it complicates the arrangement more, unless I can find a multi-gauge in one face) 5) Even considering going to electronically actuated choke control, and possibly even building an actuator on the hydraulic lift. Both with nice rocker-style switches. 6) Replacing the PTO toggle switch with a rocker-style switch as well. I'd have to figure out how to keep the safety interlock on the PTO, as Matt mentioned, and have some kind of safety function to the switch. I'm pretty sure this can be figured out. 7) Probably change the headlight control to a rocker switch as well, to keep it all consistent. 8) I'm thinking about just patching over that speed control lever stop. I can't see much use for it. The PO has just taken it off, so I'd have to get another one if I wanted it. It just seems useless, and a big hole in the dash. Anyone want to testify to the great utility of this control and talk me out of it? I understand that all of this represents a lot of work, and a lot of expense. But this is the stuff I'm really interested in. I may back down on the big ideas as I move along and want to get it done for expediency or cost control, but a guy can dream, can't he? 
|
|
#83
07-11-2011, 11:15 AM
|
||||
|
||||
|
After further reading, I'm not sure there would be any value in an oil pressure gauge. I saw where on a Courage series, Kohler says 3-90 is an acceptable range (?) I haven't found anything on the k series.
|
|
#84
07-11-2011, 11:46 AM
|
|||
|
|||
|
The one mod I see as being useful would be the fuel gauge on the dash. I really like that idea. My 1450 has a 2 gallon tank and I'm used to my other (soon to be sold!) tractor's 4 gallon tank. The cap-gauge on my 1450 is completely toasted and replacing it with the same thing doesn't seem like a good idea since the original one melted down much like the IH Logo did on the headlight grills of these monsters. By the way, I am replacing my IH headlight grill logo on mine with an older cast aluminum one from a junked original. my plan is to either chrome plate it or nickel plate it
 ! !...........oh yeah, and I also agree with you about that speed control knob. Mine is missing and I likewise don't miss it. I have hands and fingers to keep the speed in check. Maybe I'll put the fuel gauge where that speed control normally goes?
__________________
Dave
|
|
#85
07-11-2011, 11:51 AM
|
||||
|
||||
|
A/F Ratio Gauge would be awesome!
Fuel Gauge would be awesome! Tachometer would be the first and foremost in my mind, of all the gauges you listed. Excited to see if any of these get implemented - I'm a geek for gauges too
|
|
#86
07-12-2011, 01:50 AM
|
||||
|
||||
|
More taking down today.
I pulled the steering wheel using the home made 2x4 setup with a puller. That thing was really on there. I had tightened it to the point that I was worried about breaking something with a 3/8" drive ratchet on the puller, and then had to give it several whacks with a hammer to get it free. I built my puller using mostly 1/4" threaded rod. I had a junky piece of it sitting around, and it was available (rather than multiple trips to the hardware store to pick up long bolts that I didn't have.) . 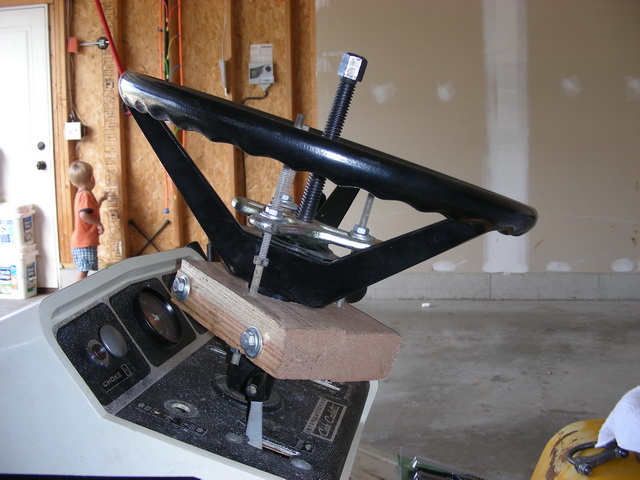 . Now here's an idea I tried last week and gave up on. When I first read about fabricating a puller, I thought maybe I'd be lucky and my wheel wouldn't be stuck too hard, so I simply sat the puller on the column and went in, out, and around 10-12 times with nylon corded 1/4" rope. . 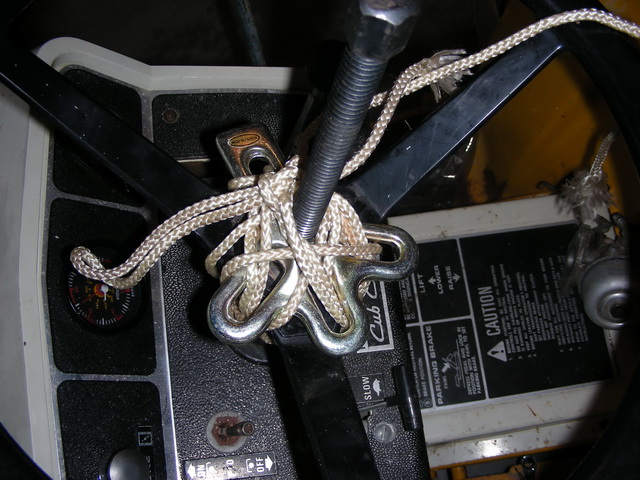 . I cranked it with the socket wrench to the point I was at today (before I hit it with the hammer,) then chickened out and quit. But I seriously wonder if I'd have hit it a few times if it would have worked. Perhaps the flex of the rope would have reduced the effect of the hammer blows, but I'm beginning to suspect that it would have worked had I tried it. I was really, really tight with that socket drive and the rope. I'd like to see if someone else can pull this off, because it could save a good bit of time and hardware vs. building the 2x4 puller if you can make it work. Removing the control panel just required pulling some wires and a few screws from the dash panel. I took a lot of pictures for myself to make notes of the wiring, but I still think it's going to be a challenge to rewire. On that note, I think I'll build a new wiring harness myself. When I was a kid, I used to build wiring harnesses for my Dad, who supplied them to a kit car manufacturer. It's pretty easy stuff. Then I got to removing the tower, and looking around I tried to find the best method to disconnect some stuff. In trying to disconnect the hydraulic lift shaft, I targeted the clip that held the shaft to the hydraulic unit, and when I put a screwdriver on it, I broke it. . 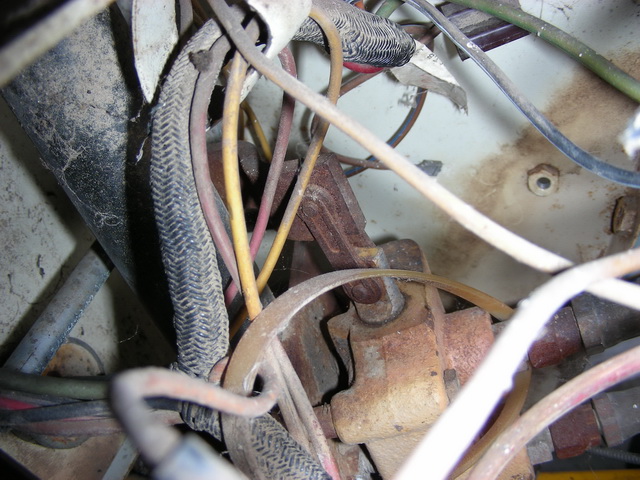 . 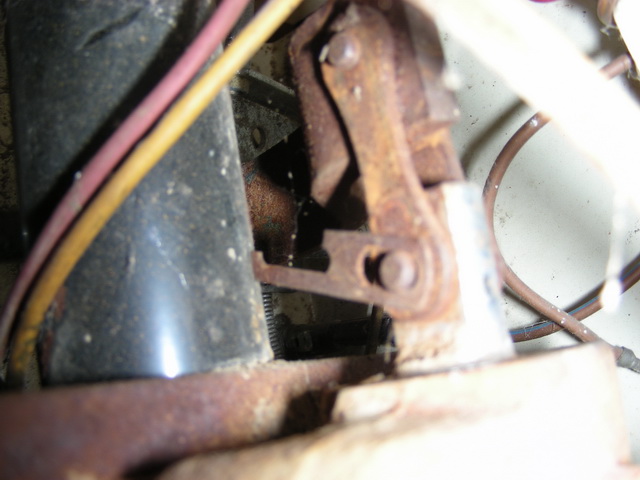 . I figure I can probably replace that pretty easily, or simply go with two horseshoe clips instead, but I'll bet someone here knows a better way to go about removing this shaft... The rest of it was pretty straight forward, getting the tower and the frame cover off. Take lots of pictures of the wiring! Now on to the fender pan. The four bolts in the battery area are easy, but the ones on the foot rests are a challenge. I put a 9/16" 6-sided socket on the bottom side, and they turned stripped in no time. These are soft metal, and obviously rusted. I've read some stuff on removing them, and will have to review it. I know it had to do with heat and such. But given that the plates are in such bad shape and I'm considering alternatives to replacing them (and my propensity to have little patience with such things,) I went after them with my side grinder with a cutting blade: . 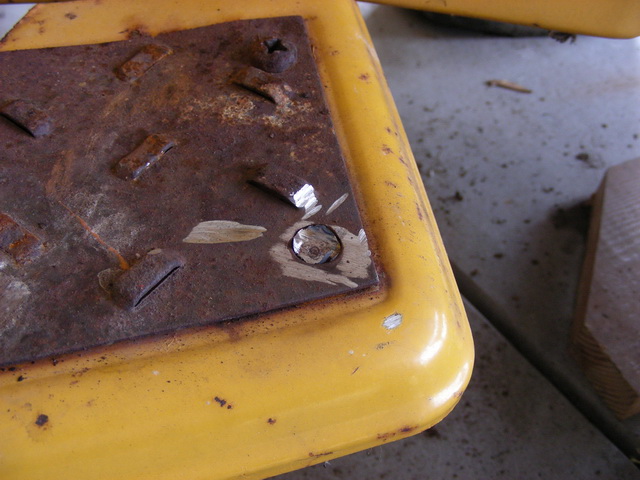 . As you can see, I hit the foot grip a few times. Once I did that, I started to think that maybe I'd want to reuse them, so maybe I'd better not hack at it. So on to try another method...
|
|
#87
07-12-2011, 01:56 AM
|
||||
|
||||
|
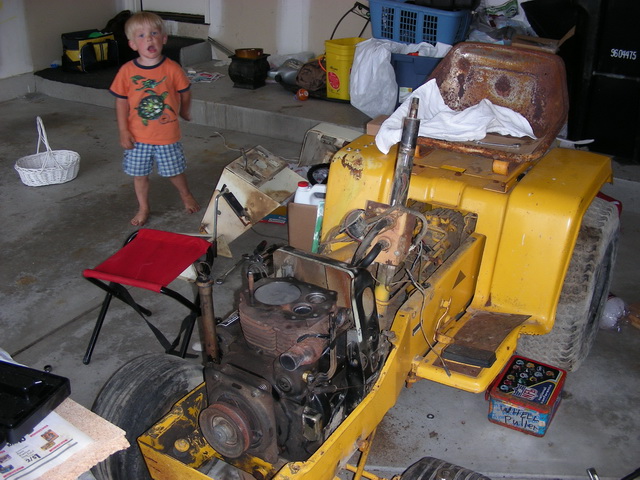
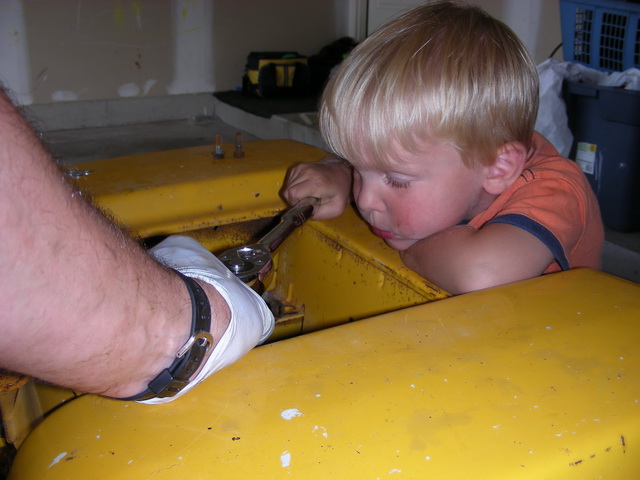
Here's where we're at on the break-down. Ryan has been getting some ratchet training on these parts.
 . 
|
|
#88
07-12-2011, 10:00 AM
|
|||
|
|||
|
Good idea on the gauges, just wanted to give some insight.
Oil pressure guage would not work as a K engine is a slush box and there is no oil pump or pressurized oil at all. Now some engines do use an oil level sensore so you could tell if your oil was getting low. A/F ratio gauge, I assume you are referring to to the ones sold at auto parts stores. These are narrow band O2 gauges and really only display accuratly at a stoich mixture, anthing lean or rich of that is a best guess. A wideband sensor and gauge is what is used by tuners and is very accurate. For either gauge you would need some kind of controler to send the O2 sensore voltage, I believe it was 5 volts, but depends on the application. O2 sensore are also sensative and I would be curious if using the choke would cause the sensore to get dirty quicker as they are usualy used in FI vehicles. An idea for the PTO switch with a safety is launch switches from air crafts with the red cover over the actual switch. They also sell these at auto parts stores or mail order.
|
|
#89
07-12-2011, 11:03 AM
|
||||
|
||||
|
All good stuff Rales.
I have been looking at the wideband units, and your info and questions are things I will be sure to add to my research. That's what I was thinking of in a rocker, some kind of flip-up safety thing. I was at Car Quest the other day and didn't see anything like that, but I'm sure I'll find something online. I think there's another safety aspect that I need to address, to assure that the tractor can't start with the PTO engaged. Have to figure out how that is handled in the current arrangement. While I was at Car Quest, I asked them about their machine shop services. The machinist gave me some general numbers for a K341, and said it'd be about $35 to bore a cylinder .010 over. That's not bad. I can't remember what he said exactly for grinding valve seats and replacing / reaming guides, but I think it was only around $30-40.
|
|
|
|
Cub Cadet is a premium line of outdoor power equipment, established in 1961 as part of International Harvester. During the 1960s, IH initiated an entirely new line of lawn and garden equipment aimed at the owners rural homes with large yards and private gardens. There were a wide variety of Cub Cadet branded and after-market attachments available; including mowers, blades, snow blowers, front loaders, plows, carts, etc. Cub Cadet advertising at that time harped on their thorough testing by "boys - acknowledged by many as the world's worst destructive force!". Cub Cadets became known for their dependability and rugged construction.
MTD Products, Inc. of Cleveland, Ohio purchased the Cub Cadet brand from International Harvester in 1981. Cub Cadet was held as a wholly owned subsidiary for many years following this acquisition, which allowed them to operate independently. Recently, MTD has taken a more aggressive role and integrated Cub Cadet into its other lines of power equipment.
This website and forum are not affiliated with or sponsored by MTD Products Inc, which owns the CUB CADET trademarks. It is not an official MTD Products Inc, website, and MTD Products Inc, is not responsible for any of its content. The official MTD Products Inc, website can be found at: http://www.mtdproducts.com. The information and opinions expressed on this website are the responsibility of the website's owner and/or it's members, and do not represent the opinions of MTD Products Inc. IH, INTERNATIONAL HARVESTER are registered trademark of CNH America LLC
All material, images, and graphics from this site are the property of www.onlycubcadets.net. Any unauthorized use, reproductions, or duplications are prohibited unless solely expressed in writing.
Cub Cadet, Cub, Cadet, IH, MTD, Parts, Tractors, Tractor, International Harvester, Lawn, Garden, Lawn Mower, Kohler, garden tractor equipment, lawn garden tractors, antique garden tractors, garden tractor, PTO, parts, online, Original, 70, 71, 72, 73, 76, SO76, 80, 81, 86, 100, 102, 104, 105, 106, 107, 108,109, 122, 123, 124, 125, 126, 127, 128, 129, 147, 149, 169, 182, 282, 382, 482, 580, 582, 582 Special, 680, 682, 782, 782D, 784, 800, 805, 882, 982, 984, 986, 1000, 1015, 1100, 1105, 1110, 1200, 1250, 1282, 1450, 1512, 1604, 1605, 1606, 1610, 1615, 1620, 1650, 1710, 1711, 1712, 1806, 1810, 1811, 1812, 1912, 1914.


 Linear Mode

