
|
PLEASE PATRONIZE OUR SPONSORS!


|
|||||||
 |
|
|
Thread Tools | Display Modes |
|
#11
 07-26-2010, 09:17 PM
|
||||
|
||||
|
"shrugs", to me just seems easier to do it with the kit and have exact square dimensions, than know my crappy welding and filing, will probably make more of a mess than fix it
 .... I also I would not see the need to lay a complete bead around all four sides, creating a huge amount of heat as you suggest. But then again, that's why I am here, trying to learn. Think I'll just do more reading and note taking for awhile, less suggestions .... I also I would not see the need to lay a complete bead around all four sides, creating a huge amount of heat as you suggest. But then again, that's why I am here, trying to learn. Think I'll just do more reading and note taking for awhile, less suggestions  . .
__________________
DWayne 1973: 128, ag tires, 3pt. lift, spring assist, lights, 42" Deck 10" moldboard plow 2016 XT1 42" deck 18HP 
|
|
#12
07-26-2010, 09:52 PM
|
||||
|
||||
|
I still think that if you're capable of welding the repair piece on, you're definitely capable of welding up the corners. I've had to do 6 or 7 of them...not a big job. In my opinion and experience, it's just as easy (and cheaper) to just weld up and grind/file the corners.
BTW, don't forget to shim that plate that pivots on the trunion shaft, as that causes the same issues...I learned this after doing the repair we've been discussing in this thread, only to continue to have the same problem I then realized how wobbly that plate was on the trunion shaft.
|
|
#13
07-27-2010, 09:05 AM
|
|||
|
|||
|
The repair kit would be alright if you cut off one of the long sides and (leaving you with a square "C" or "U" shaped piece) and then cut yours off the same way and welded it the new part on where the old one was, but you would still
be filing two corners. I agree with zelda, it only takes a few minutes to pull the transaxle out. I bet I could almost pull a transaxle faster than I can get the clip off while it's still in the tractor. I also agree with Matt, welding the whole thing on creates too much heat.
|
|
#14
07-27-2010, 09:40 AM
|
||||
|
||||
|
I'm not a welder at all and I was capable of welding mine up. I bought the repair kit but I let Matt talk me into attempting the "filler" method and I'm glad I did. Definitely do the shims too. I just went through all of this about a week or two ago on my 127. It works like new now!!!!
BTW I used the repair piece as a guide for filing.....
__________________
Gary '49 Farmall Cub, '62 "Original, '70 73 w/402-D Haban sickle, '71 127 w/38" cast end deck, '73 149, '76 Sof76, '07 LT1045 w/bagger, '09 GT2544 w/bunch of mods. 5 Exmarks, Kubota B2920, blah, blah, blah...
|
|
#15
07-27-2010, 04:40 PM
|
||||
|
||||
|
LOL, ok, i will give filling it in and filing a go. What's the worst that could happen? Extra filing? hahahahahaha.... I had read about the shims, I think the local Tractor supply store had some shims back in the hitch and pin area. Mine had a small amount of wobble but seemed to center up pretty good. Are the inner dimensions where the springs go, 3/4" x 1 3/16" ?
__________________
DWayne 1973: 128, ag tires, 3pt. lift, spring assist, lights, 42" Deck 10" moldboard plow 2016 XT1 42" deck 18HP
|
|
#16
07-27-2010, 07:27 PM
|
|||
|
|||
|
Well, I got her all welded up and put back together. It seems 200 percent better. I should have snapped a few pics but I was kinda in a hurry. I got pretty sick of doing a few tacks then waiting, then repeating. I wrapped a wet rag around the linkage then cut a slit in one of my old leather welding jackets and slid it over the unit for extra precaution. I do need to adjust the linkage a bit as it wants to go in reverse a bit when I let off the brake but it is safe for me to use now. It doesn't want to fly forward when I brake now, haha! It was pretty scarry there for awhile. I can actualy get into some tight places when mowing now instead of being scarred I was going to crash into stuff. I'm new to these beasts but am learning very quickly to work on them. Thanks to all that gave me advise as it helped greatly.

|
|
#17
08-11-2010, 05:49 PM
|
||||
|
||||
|
OK, I admit that fill welding the trunion arm was not that bad. I wrapped a soaking wet tshirt around the shaft and over the transmission while welding and only filled a bit at a time and filed, then filled and filed. Probably only took 20 minutes time to do it. I no longer fear fixing those things
... thanks for all the input and suggestions.new springs, pins, and all cleaned up and rust removed and smoothed out. 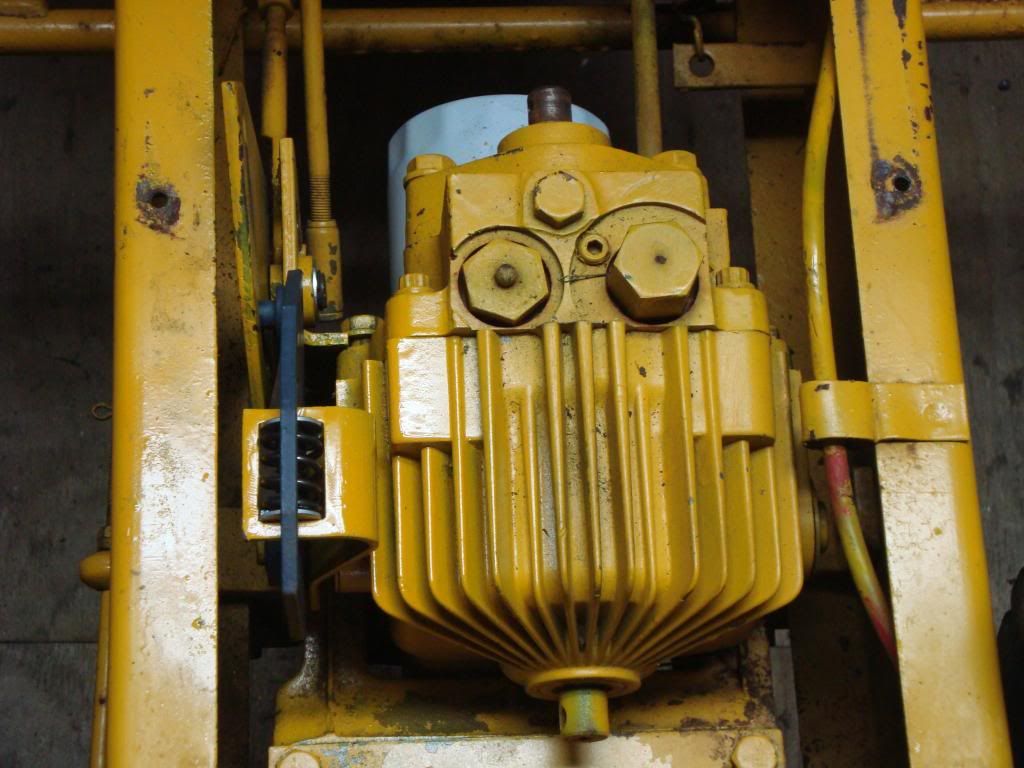 All I have left to do is to get some shims for the brackets 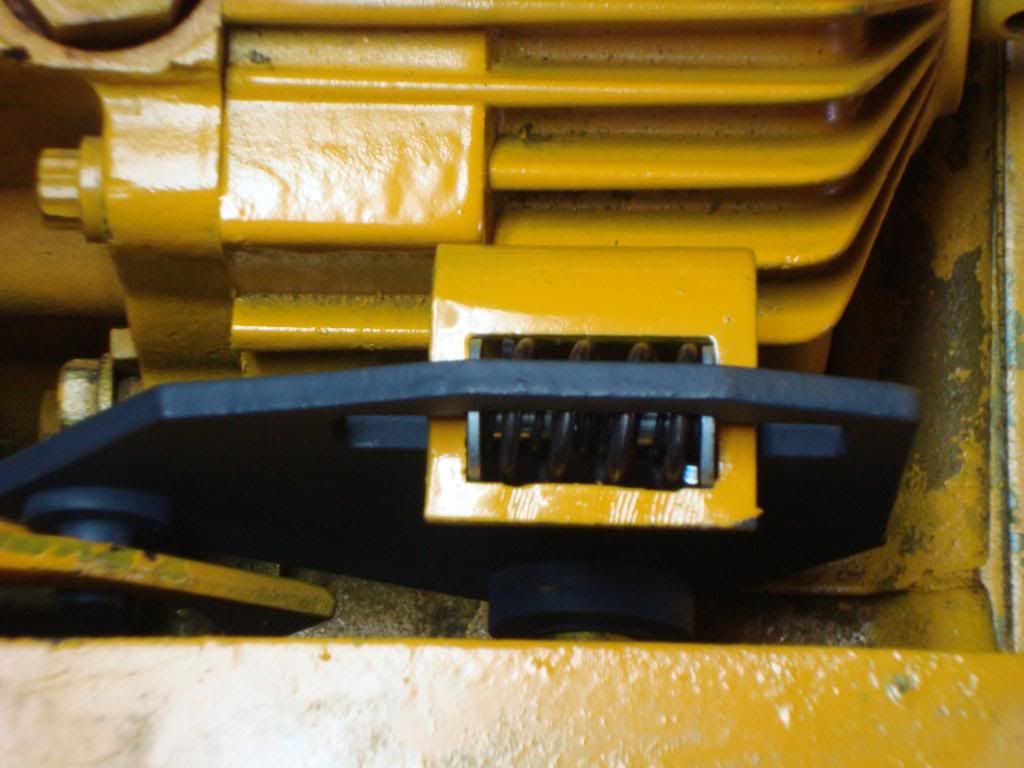
__________________
DWayne 1973: 128, ag tires, 3pt. lift, spring assist, lights, 42" Deck 10" moldboard plow 2016 XT1 42" deck 18HP
|
|
#18
08-11-2010, 10:08 PM
|
||||
|
||||
|
Matt - could you elaborate on "shimming the plate"? I've got the parts for the trunion repair, and a new gasket for the leaking hydro/transaxle joint. So when I get the tractor split I want to get everything done at one time.
Was it you that recommended replacing all the rag joints and their Nylock type nuts when doing the hydro creep repair?
|
|
#19
08-11-2010, 10:22 PM
|
||||
|
||||
|
Might have been me. I replace the rag joints if they are bad when I take the driveshaft out, and I pretty much always replace the locknuts, since they don't lock very well the second time. I put shim washers between the cam plate and the snap ring that retains it on the trunion shaft to reduce the side-to-side play in that assembly.
|
|
#20
08-11-2010, 10:23 PM
|
||||
|
||||
|
I will have to order the shims from McMaster Carr, none of the local hardware stores have anything that thin.
This might help:
__________________
DWayne 1973: 128, ag tires, 3pt. lift, spring assist, lights, 42" Deck 10" moldboard plow 2016 XT1 42" deck 18HP
|
|
|
|
Cub Cadet is a premium line of outdoor power equipment, established in 1961 as part of International Harvester. During the 1960s, IH initiated an entirely new line of lawn and garden equipment aimed at the owners rural homes with large yards and private gardens. There were a wide variety of Cub Cadet branded and after-market attachments available; including mowers, blades, snow blowers, front loaders, plows, carts, etc. Cub Cadet advertising at that time harped on their thorough testing by "boys - acknowledged by many as the world's worst destructive force!". Cub Cadets became known for their dependability and rugged construction.
MTD Products, Inc. of Cleveland, Ohio purchased the Cub Cadet brand from International Harvester in 1981. Cub Cadet was held as a wholly owned subsidiary for many years following this acquisition, which allowed them to operate independently. Recently, MTD has taken a more aggressive role and integrated Cub Cadet into its other lines of power equipment.
This website and forum are not affiliated with or sponsored by MTD Products Inc, which owns the CUB CADET trademarks. It is not an official MTD Products Inc, website, and MTD Products Inc, is not responsible for any of its content. The official MTD Products Inc, website can be found at: http://www.mtdproducts.com. The information and opinions expressed on this website are the responsibility of the website's owner and/or it's members, and do not represent the opinions of MTD Products Inc. IH, INTERNATIONAL HARVESTER are registered trademark of CNH America LLC
All material, images, and graphics from this site are the property of www.onlycubcadets.net. Any unauthorized use, reproductions, or duplications are prohibited unless solely expressed in writing.
Cub Cadet, Cub, Cadet, IH, MTD, Parts, Tractors, Tractor, International Harvester, Lawn, Garden, Lawn Mower, Kohler, garden tractor equipment, lawn garden tractors, antique garden tractors, garden tractor, PTO, parts, online, Original, 70, 71, 72, 73, 76, SO76, 80, 81, 86, 100, 102, 104, 105, 106, 107, 108,109, 122, 123, 124, 125, 126, 127, 128, 129, 147, 149, 169, 182, 282, 382, 482, 580, 582, 582 Special, 680, 682, 782, 782D, 784, 800, 805, 882, 982, 984, 986, 1000, 1015, 1100, 1105, 1110, 1200, 1250, 1282, 1450, 1512, 1604, 1605, 1606, 1610, 1615, 1620, 1650, 1710, 1711, 1712, 1806, 1810, 1811, 1812, 1912, 1914.


 Linear Mode

