
|
PLEASE PATRONIZE OUR SPONSORS!


|
|||||||
 |
|
|
Thread Tools | Display Modes |
|
#441
 10-12-2011, 07:47 AM
|
||||
|
||||
|
There is a spring between the brake plate and the pulley, so when you tighten the brake plate, it tightens the gap from 0.060" to whatever it's supposed to be installed. You might want to pull that clutch off and see why it's not touching evenly. It is probably something as simple as one of the springs is bent a bit.

|
|
#442
10-13-2011, 02:09 AM
|
||||
|
||||
|
What I learned here was that it didn't really matter how the driven disc sat on the driving hub before I installed the brake plate. Even the language in the Service Manual seems to be loose on the whole .060 to .090 thing.
My gaps on the bench were way over .090 on one side and way under .060 on the other. So I started to think that I needed to find some more shims for the PTO. But they're NLA (no longer available) and I realized that with the brake plate adjustments, I'd still accomplish the .010" gap between the two primary components. The brake plate will bring it all into alignment when you adjust it. and this was the measurement that the service manual deemed critical. So I guess that over 33 years, the springs on my driven disk have weakened. But while they don't stand as high unrestricted, they'll still meet specs when the brake plate nuts are tightened. make sense?
|
|
#443
10-13-2011, 02:17 AM
|
||||
|
||||
|
Time to get caught up on the Rebuilding steps, 'cause I'm getting close to firing this baby up and I'm behind on my documentation...
|
|
#444
10-13-2011, 02:51 AM
|
||||
|
||||
|
Step 12: Install piston / Connecting rod
Lubricate the piston and rings with fresh engine oil. Orient the piston so that the identifying marks are in the appropriate position. This varies depending on the style of piston you have (see the Kohler Service Manual.) For my type of piston, the notch must face the flywheel. I used a ring compressor that I purchased at Harbor Freight for $8, but this can be done without that tool with a little patience. Based on my experience using one, however, I think it was a nice little tool to have for my rebuild at a minimal cost. Here's the ring compressor on the assembly before it goes into the block. 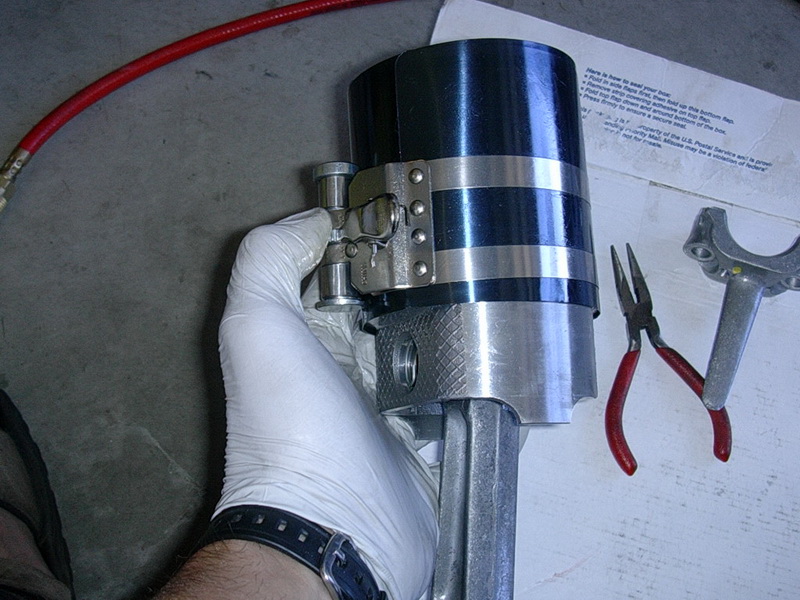 The compressor makes everything tight so that the whole assembly can be moved into the bore at once. After you get it snugged up, you can tap the piston into the bore with a rubber mallet. 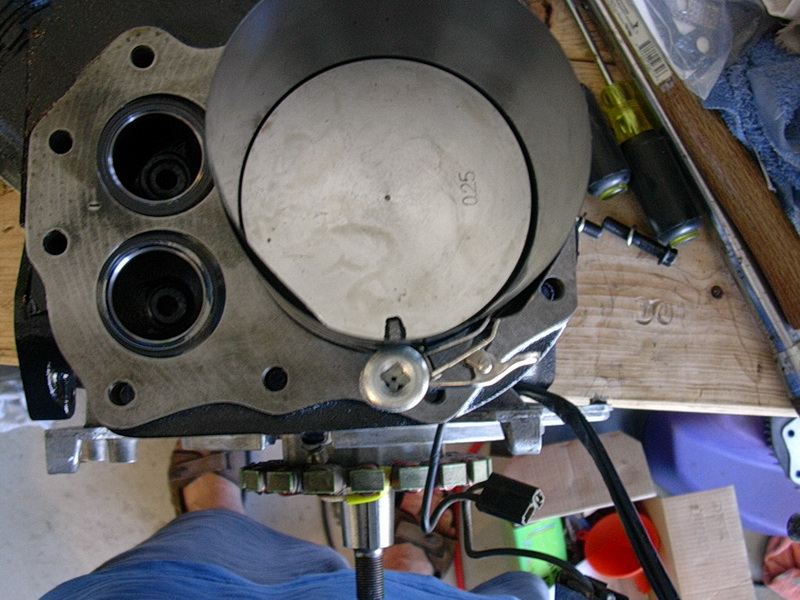 Bring the rod down to sit on the crank journal (the "journal" is the smooth round mounting surface, where your rod connects.) Then, making sure your oil hole is toward the camshaft, and bolt up the rod cap.  Tighten these bolts to spec, which will be noted in your service manual. Mine was 285 in/lb, and since my in/lb torque wrench didn't go that high, I had to convert it to ft/lb using this online converter, and tightened the bolts to about 24 ft/lb. 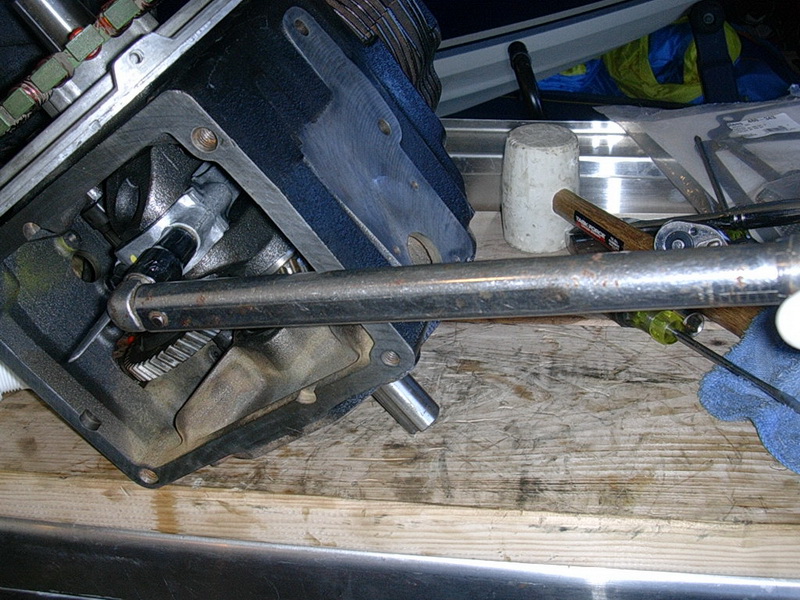
|
|
#445
10-13-2011, 02:58 AM
|
||||
|
||||
|
Step 13: Install Oil Pan
Well, this is pretty simple. But it's good to have a simple step documented within a long list of stuff. It makes you feel like you can understand something.  [IMG] 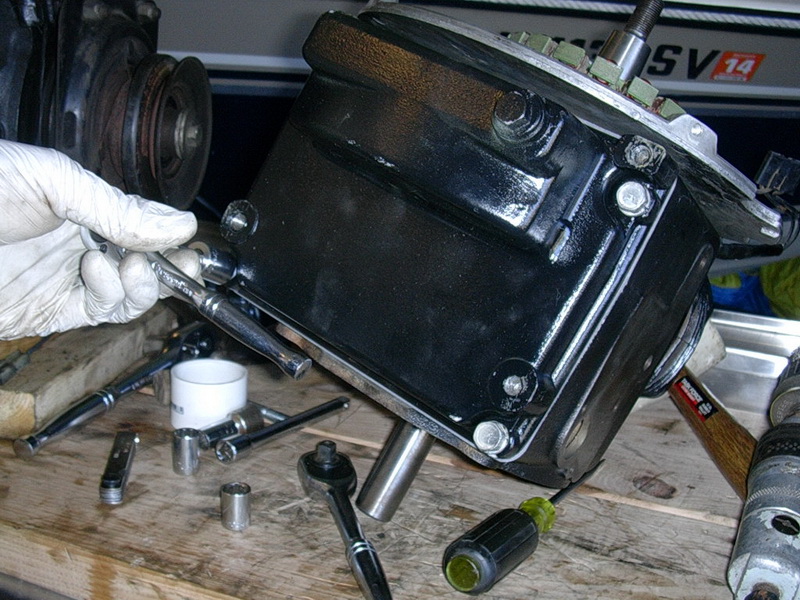 [/IMG] [/IMG]
|
|
#446
10-13-2011, 03:16 AM
|
||||
|
||||
|
Step 14: Install Valves
Here's the order of your valve parts. It's all put together pre-installation to show how things go together. Note that the spring has a few tighter loops at one end. If you have doubt, start at one side of the spring and turn it while your eyes follow the coil from outside to inside. One will be obviously shorter in the time it takes your eye to move toward center. The tighter (closer wound) end of the spring is the top.  Then use the valve spring tool to compress the spring while you put the keepers in place. 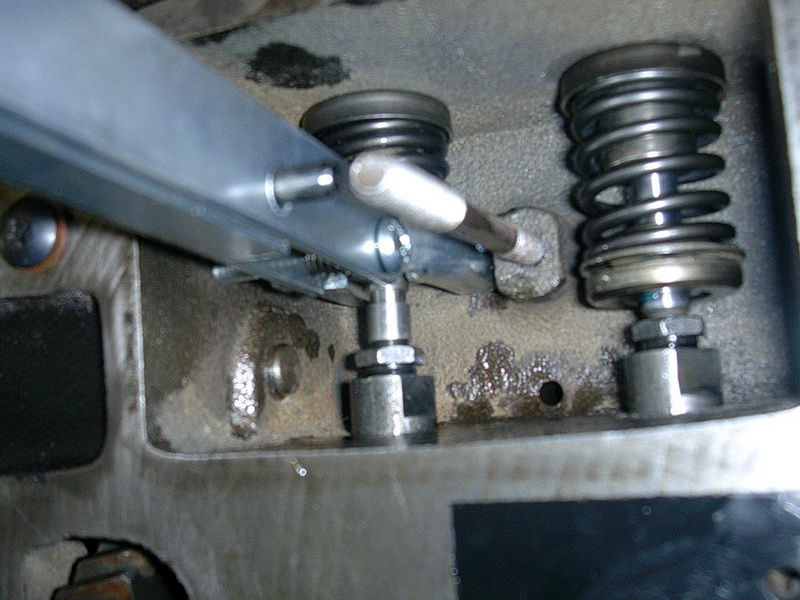 It helps to put a dab of grease on the keepers to help hold them on the valve shaft while you put it together. The keepers go on as a conical shape, wider at the bottom. 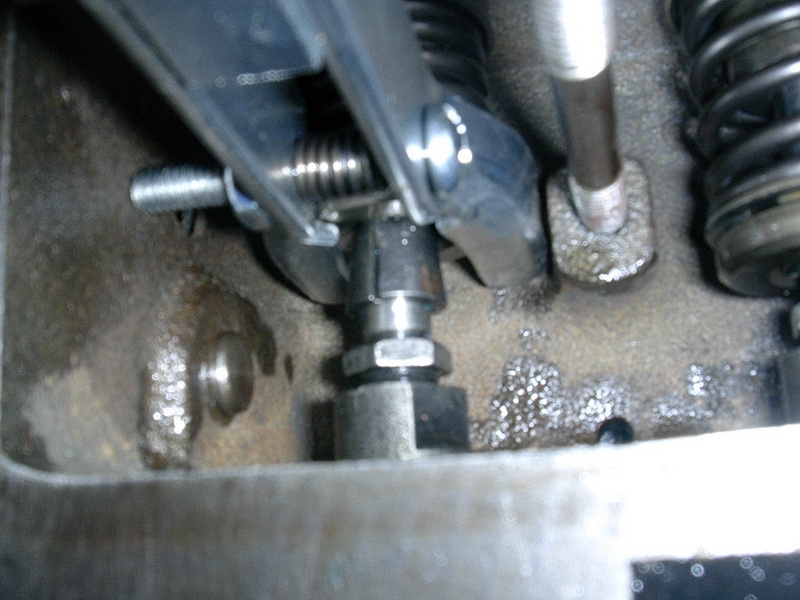 Then you adjust your valve lashes. I think I did sufficient detail on that early in the thread (this post), whence I thought I'd be just doing a valve job and this and that...before I tore the whole thing down to do a complete rebuild...
|
|
#450
10-13-2011, 12:38 PM
|
||||
|
||||
|
Quote:
|
|
|
|
Cub Cadet is a premium line of outdoor power equipment, established in 1961 as part of International Harvester. During the 1960s, IH initiated an entirely new line of lawn and garden equipment aimed at the owners rural homes with large yards and private gardens. There were a wide variety of Cub Cadet branded and after-market attachments available; including mowers, blades, snow blowers, front loaders, plows, carts, etc. Cub Cadet advertising at that time harped on their thorough testing by "boys - acknowledged by many as the world's worst destructive force!". Cub Cadets became known for their dependability and rugged construction.
MTD Products, Inc. of Cleveland, Ohio purchased the Cub Cadet brand from International Harvester in 1981. Cub Cadet was held as a wholly owned subsidiary for many years following this acquisition, which allowed them to operate independently. Recently, MTD has taken a more aggressive role and integrated Cub Cadet into its other lines of power equipment.
This website and forum are not affiliated with or sponsored by MTD Products Inc, which owns the CUB CADET trademarks. It is not an official MTD Products Inc, website, and MTD Products Inc, is not responsible for any of its content. The official MTD Products Inc, website can be found at: http://www.mtdproducts.com. The information and opinions expressed on this website are the responsibility of the website's owner and/or it's members, and do not represent the opinions of MTD Products Inc. IH, INTERNATIONAL HARVESTER are registered trademark of CNH America LLC
All material, images, and graphics from this site are the property of www.onlycubcadets.net. Any unauthorized use, reproductions, or duplications are prohibited unless solely expressed in writing.
Cub Cadet, Cub, Cadet, IH, MTD, Parts, Tractors, Tractor, International Harvester, Lawn, Garden, Lawn Mower, Kohler, garden tractor equipment, lawn garden tractors, antique garden tractors, garden tractor, PTO, parts, online, Original, 70, 71, 72, 73, 76, SO76, 80, 81, 86, 100, 102, 104, 105, 106, 107, 108,109, 122, 123, 124, 125, 126, 127, 128, 129, 147, 149, 169, 182, 282, 382, 482, 580, 582, 582 Special, 680, 682, 782, 782D, 784, 800, 805, 882, 982, 984, 986, 1000, 1015, 1100, 1105, 1110, 1200, 1250, 1282, 1450, 1512, 1604, 1605, 1606, 1610, 1615, 1620, 1650, 1710, 1711, 1712, 1806, 1810, 1811, 1812, 1912, 1914.


 Linear Mode

