
|
PLEASE PATRONIZE OUR SPONSORS!


|
|||||||
 |
|
|
Thread Tools | Display Modes |
|
#291
 08-15-2011, 03:43 PM
|
||||
|
||||
|
Alright, I got the crossmember off and re-welded it properly. I just took the angle grinder and went right from the top of the crossmember, ground the whole thing down to where I could break it free, then ground and filed off the rest of the weld. And I didn't hack it up so it's OK.

|
|
#292
08-18-2011, 01:54 AM
|
||||
|
||||
|
The K341 is back from the machine shop, but it doesn't look like I'll have time to get it put back together and ready to install in the 1450 for this weekend. We're heading to the cabin and I was really looking forward to tackling some high grass with it.
I have the new governor gear, shaft, and bushing ready to pick up tomorrow, which could have set me on the timeline. But I delved into the carb rebuild today and ran into two problems. As much as I paid attention to Matt's instructions, I still broke one of the brass screws off on the throttle shaft. I was cautious as all get-out, but it still broke. The other one was easy. So I drilled out the remnants of the brass screw, but the 1/16" bit deflected and damaged the threads. It's all a mess now. I could re-drill and tap it to a bigger screw, but I'm just going to go ahead and replace the shaft. Also, I was cleaning the long high idle screw and found that it had a shard at the tip, so it needs to be replaced. A couple more items to order... I did wire-wheel and paint the block, so there's some progress. Broken throttle shaft screw: 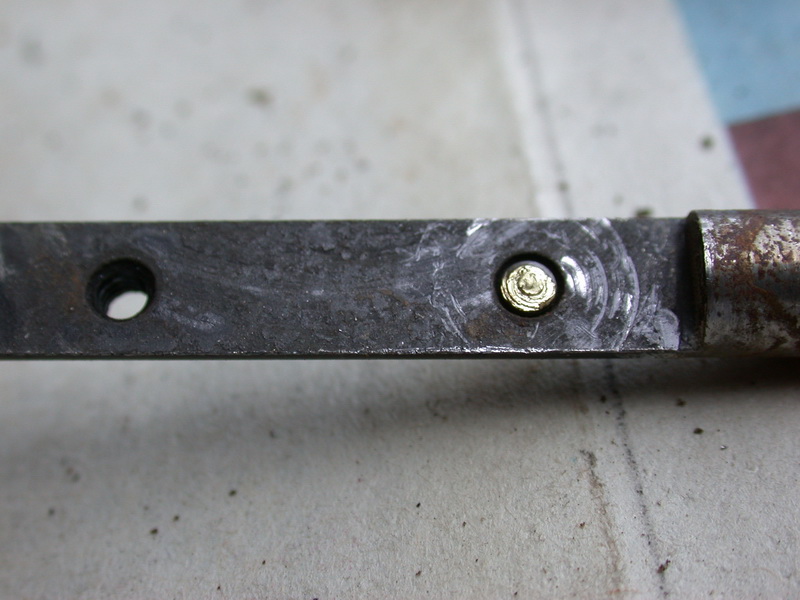 . Here's the ugly threads, they look worse from the other side: 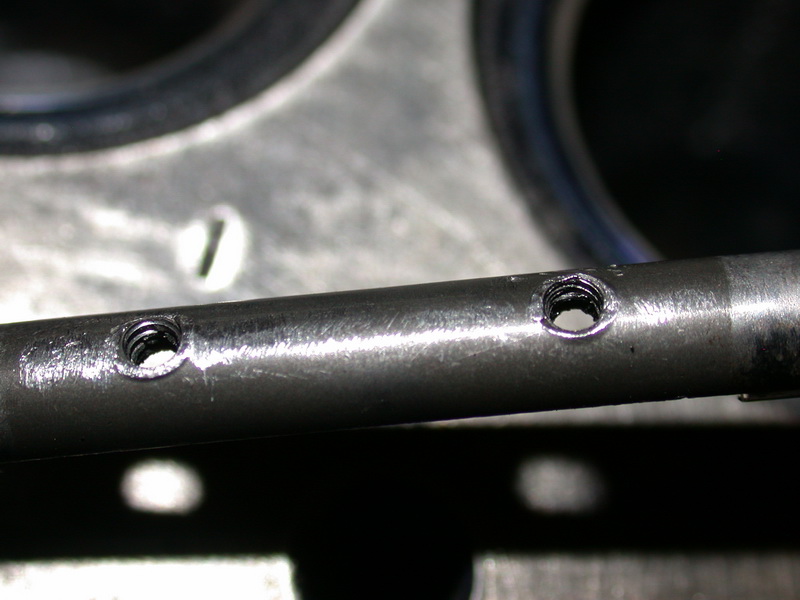 . You can just barely see the deformation of the high idle screw here: 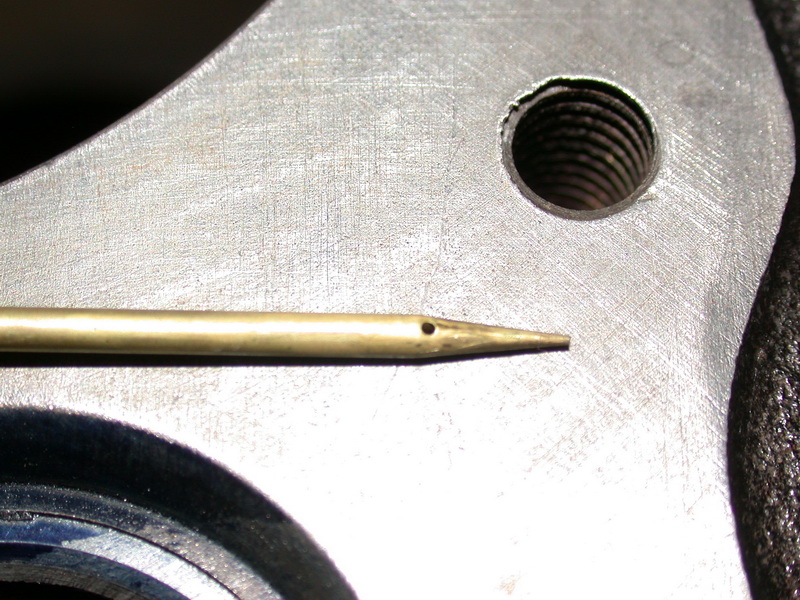 . And my purdy block: . 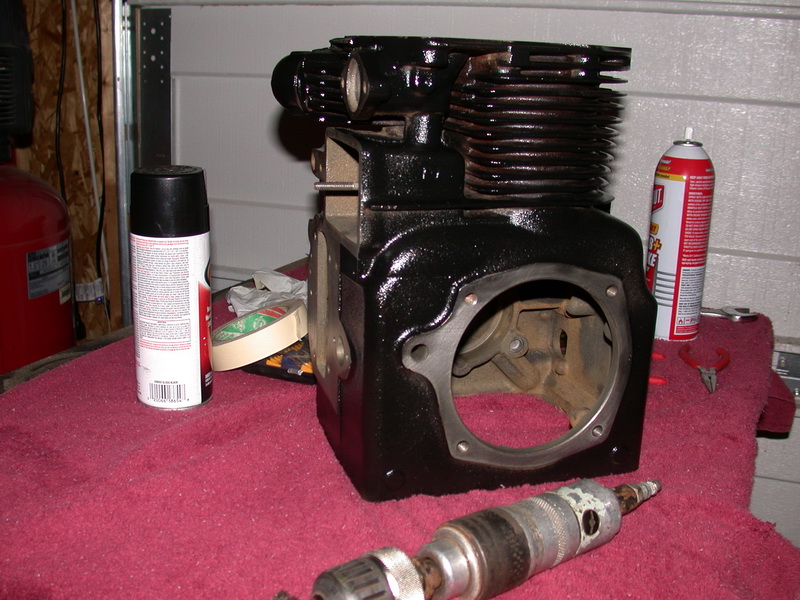
|
|
#294
08-18-2011, 10:31 AM
|
||||
|
||||
|
I had to install the throttle shaft bushings to fix the slop in the shaft, so the screws had to come out. I did leave the choke shaft together for the dip.
|
|
#295
08-18-2011, 11:10 AM
|
||||
|
||||
|
Quote:
 My magnet finally found it. My magnet finally found it.
__________________
DWayne 1973: 128, ag tires, 3pt. lift, spring assist, lights, 42" Deck 10" moldboard plow 2016 XT1 42" deck 18HP
|
|
#297
08-18-2011, 11:59 AM
|
||||
|
||||
|
Quote:
Dwayne was referring to the detent ball/ spring that is on the choke shaft, I too got to spend some quality time rolling around the shop floor looking for mine as well. It is there to help hold the choke open. Dave, those screws are staked on the back side, the exposed threads/ end of the screw where hammered on to keep them from shaking loose. I broke of 2 of the 4 originals (I looked at Matt's how to, but neglected to leave the choke alone, I removed it as well). I then ordered 4 replacements from Chris Westfall, kohler parts I think, they were the brass ones on his sight, then I managed to twist all of these off as well. So I am pretty good at getting out the broken ones, I used a thin cutoff wheel in the dremel to slit them and was able to use a tiny screw driver to get the out. Since these twist off so easy, I recommend you order some steel replacements, Matt says in his how to that he thinks they are #3x48 screws, and he is exactly right. I think the next one I take apart for cleaning I will leave the choke butterfly in place, and to remove those brass screws, I am going to tighten them until they twist off, the use some small needle nose pliers on the backside and thread the remaining part out from the back, there is enough exposed threads to get a hold of and that way you don't have to fight the staking.
__________________
Jeff Brookfield, MO ________________ IH Red 782 with weights and sleeve hitch! IH snow blade, Brinly plow, Brinly disk, Brinly harrow, Johnson rear blade, and a #2 IH Cart
|
|
#298
08-18-2011, 12:11 PM
|
||||
|
||||
|
I dunno, I'd be cautious about breaking the heads off on purpose and then trying to get them out from the backside. That brass can twist and break pretty easily trying to grab it with pliers.
I almost think the best strategy would be to go in there with the dremel and grind away the peened end first, then back out the screws.
|
|
#299
08-18-2011, 12:24 PM
|
||||
|
||||
|
Quote:
I don't think you can get to the backside if them without removing the butterfly first, after you twist the heads off, you can spin the shaft to access the back side. Then you can either grab them and thread them out, or cut a slit in it and remove it with a screw driver. They come out pretty easy from the back side.
__________________
Jeff Brookfield, MO ________________ IH Red 782 with weights and sleeve hitch! IH snow blade, Brinly plow, Brinly disk, Brinly harrow, Johnson rear blade, and a #2 IH Cart
|
|
#300
08-18-2011, 05:07 PM
|
||||
|
||||
|
You can use a small file and file off the peened-over end and then remove them. That is what I have typically done. I have also twisted a few off; I suspect the original installer got carried away once in awhile and over-torqued them. It wouldn't take much.
|
|
|
|
Cub Cadet is a premium line of outdoor power equipment, established in 1961 as part of International Harvester. During the 1960s, IH initiated an entirely new line of lawn and garden equipment aimed at the owners rural homes with large yards and private gardens. There were a wide variety of Cub Cadet branded and after-market attachments available; including mowers, blades, snow blowers, front loaders, plows, carts, etc. Cub Cadet advertising at that time harped on their thorough testing by "boys - acknowledged by many as the world's worst destructive force!". Cub Cadets became known for their dependability and rugged construction.
MTD Products, Inc. of Cleveland, Ohio purchased the Cub Cadet brand from International Harvester in 1981. Cub Cadet was held as a wholly owned subsidiary for many years following this acquisition, which allowed them to operate independently. Recently, MTD has taken a more aggressive role and integrated Cub Cadet into its other lines of power equipment.
This website and forum are not affiliated with or sponsored by MTD Products Inc, which owns the CUB CADET trademarks. It is not an official MTD Products Inc, website, and MTD Products Inc, is not responsible for any of its content. The official MTD Products Inc, website can be found at: http://www.mtdproducts.com. The information and opinions expressed on this website are the responsibility of the website's owner and/or it's members, and do not represent the opinions of MTD Products Inc. IH, INTERNATIONAL HARVESTER are registered trademark of CNH America LLC
All material, images, and graphics from this site are the property of www.onlycubcadets.net. Any unauthorized use, reproductions, or duplications are prohibited unless solely expressed in writing.
Cub Cadet, Cub, Cadet, IH, MTD, Parts, Tractors, Tractor, International Harvester, Lawn, Garden, Lawn Mower, Kohler, garden tractor equipment, lawn garden tractors, antique garden tractors, garden tractor, PTO, parts, online, Original, 70, 71, 72, 73, 76, SO76, 80, 81, 86, 100, 102, 104, 105, 106, 107, 108,109, 122, 123, 124, 125, 126, 127, 128, 129, 147, 149, 169, 182, 282, 382, 482, 580, 582, 582 Special, 680, 682, 782, 782D, 784, 800, 805, 882, 982, 984, 986, 1000, 1015, 1100, 1105, 1110, 1200, 1250, 1282, 1450, 1512, 1604, 1605, 1606, 1610, 1615, 1620, 1650, 1710, 1711, 1712, 1806, 1810, 1811, 1812, 1912, 1914.


 Linear Mode

