
|
PLEASE PATRONIZE OUR SPONSORS!


|
|||||||
 |
|
|
Thread Tools | Display Modes |
|
#1
 05-26-2014, 04:42 PM
|
||||
|
||||
|
I recently acquired a home made box blade with a 1650. I can't seem to find any rippers that will fit the holes. Can anybody give me some suggestions? All of the rippers I am finding are 3/4 X 2 1/2. The holes on my box blade are 3/4 X 2. One is actually 1 7/8. After taking a closer look at my blade, it doesn't appear that rippers have ever been used in these holes. If I can't find any smaller rippers, I might have to enlarge these holes to 2 1/2. Thanks.
Brent 
__________________
100, 149, 1650, 1872, 2072, 2082 (2) Brinly 10" plow, brinly disc, (3) brinly cultivator, 42" box blade, 1A tiller Johnson workhorse 10tc loader, 44a, 50a, (2) 50c, 42 & (2) 48 decks 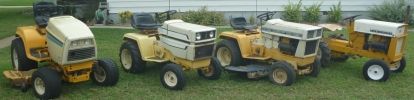

|
|
#2
05-26-2014, 04:52 PM
|
||||
|
||||
|
If all I could find were 2-1/2" versus 2", I would be opening the holes to fit the most common size.
As long as you were not restoring a trailer queen. That seek looks like a real cheek pincher 
|
|
#3
05-26-2014, 05:03 PM
|
||||
|
||||
|
Do the rippers only engage the top box piece or there a lower mount? If they only have to go through the top mount, I would notch the top of the rippers with a cutoff wheel in a grinder. It's easier, and it's not like your going to be replacing rippers often enough to warrent remaking the top mount.
My $.02 Bill
|
|
#4
05-26-2014, 05:20 PM
|
||||
|
||||
|
There is no lower mount as you speak of. The rippers go through a 3X3 piece of square tubing. The 3/4 X 2" holes are on top and bottom of the square tubing. My wife had suggested cutting the rippers down also. But since the most common size is 3/4 X 2 1/2 I'm thinking my best option is to enlarge the holes.
__________________
100, 149, 1650, 1872, 2072, 2082 (2) Brinly 10" plow, brinly disc, (3) brinly cultivator, 42" box blade, 1A tiller Johnson workhorse 10tc loader, 44a, 50a, (2) 50c, 42 & (2) 48 decks
|
|
#5
05-27-2014, 12:42 AM
|
||||
|
||||
|
Cutting out the holes would seem the best choice

__________________
Make the best of each day , Todd  Original's Face Lift thread.http://www.onlycubcadets.net/forum/s...ad.php?t=34439 (O) Start to Finish video.https://www.youtube.com/watch?v=GAoUNNiLwKs Wheel Around videohttps://www.youtube.com/watch?v=XUL-m6Bramk They can't all be turn key! 
|
|
#6
05-27-2014, 09:03 AM
|
||||
|
||||
|
Being the common rippers are 2-1/2" and the tube is 3"sq. that is going to make the hole go full width of the inside.
If it is more than 1/4" wall, you won't be able to get 2-1/2". If you can get 2-1/2" plus a few hairs, you might want to slap an angle iron or two on the outside of the tube (toes in) for reinforcement. <[]>
|
|
#7
05-27-2014, 11:27 PM
|
||||
|
||||
|
Quote:
__________________
100, 149, 1650, 1872, 2072, 2082 (2) Brinly 10" plow, brinly disc, (3) brinly cultivator, 42" box blade, 1A tiller Johnson workhorse 10tc loader, 44a, 50a, (2) 50c, 42 & (2) 48 decks
|
|
#8
05-27-2014, 11:45 PM
|
||||
|
||||
|
Ya, bottom rear corner would be the place to add an angle. 007, which way is toes in? Is that spooning the angle around the corner of the tube which means it will have to be notched like the tube? I would run the angle down the back of the tube then face the other leg towards the rear, flush with the bottom of the tube. No notching required, just stitch weld it in place.
The top front will be the next wear point, could probably get away with plating the front with a piece of 4" wide flat stock at each cutout for reinforcement. Bill
|
|
#9
05-28-2014, 12:09 AM
|
|||
|
|||
|
This may just be a silly suggestion, but why not just try some bar 2" x 3/4" bar stock as rippers? Around here the soil has so much clay that even real rippers just make slots in the ground much like what bar stock would do. Gravel is a different story.
If you really wanted to you could heat and pound the end flat and curve it to put a "blade" on it like a real ripper.
|
|
#10
05-28-2014, 08:56 AM
|
||||
|
||||
|
Quote:
On the backside of tube, put one down low. On the front side of tube put it up high. Not wrapped around or spooning the corners. Like this: <[]> (the brackets are the sq. tube)
|
|
|
|
Cub Cadet is a premium line of outdoor power equipment, established in 1961 as part of International Harvester. During the 1960s, IH initiated an entirely new line of lawn and garden equipment aimed at the owners rural homes with large yards and private gardens. There were a wide variety of Cub Cadet branded and after-market attachments available; including mowers, blades, snow blowers, front loaders, plows, carts, etc. Cub Cadet advertising at that time harped on their thorough testing by "boys - acknowledged by many as the world's worst destructive force!". Cub Cadets became known for their dependability and rugged construction.
MTD Products, Inc. of Cleveland, Ohio purchased the Cub Cadet brand from International Harvester in 1981. Cub Cadet was held as a wholly owned subsidiary for many years following this acquisition, which allowed them to operate independently. Recently, MTD has taken a more aggressive role and integrated Cub Cadet into its other lines of power equipment.
This website and forum are not affiliated with or sponsored by MTD Products Inc, which owns the CUB CADET trademarks. It is not an official MTD Products Inc, website, and MTD Products Inc, is not responsible for any of its content. The official MTD Products Inc, website can be found at: http://www.mtdproducts.com. The information and opinions expressed on this website are the responsibility of the website's owner and/or it's members, and do not represent the opinions of MTD Products Inc. IH, INTERNATIONAL HARVESTER are registered trademark of CNH America LLC
All material, images, and graphics from this site are the property of www.onlycubcadets.net. Any unauthorized use, reproductions, or duplications are prohibited unless solely expressed in writing.
Cub Cadet, Cub, Cadet, IH, MTD, Parts, Tractors, Tractor, International Harvester, Lawn, Garden, Lawn Mower, Kohler, garden tractor equipment, lawn garden tractors, antique garden tractors, garden tractor, PTO, parts, online, Original, 70, 71, 72, 73, 76, SO76, 80, 81, 86, 100, 102, 104, 105, 106, 107, 108,109, 122, 123, 124, 125, 126, 127, 128, 129, 147, 149, 169, 182, 282, 382, 482, 580, 582, 582 Special, 680, 682, 782, 782D, 784, 800, 805, 882, 982, 984, 986, 1000, 1015, 1100, 1105, 1110, 1200, 1250, 1282, 1450, 1512, 1604, 1605, 1606, 1610, 1615, 1620, 1650, 1710, 1711, 1712, 1806, 1810, 1811, 1812, 1912, 1914.


 Linear Mode

